
Chips assustadores de Halloween
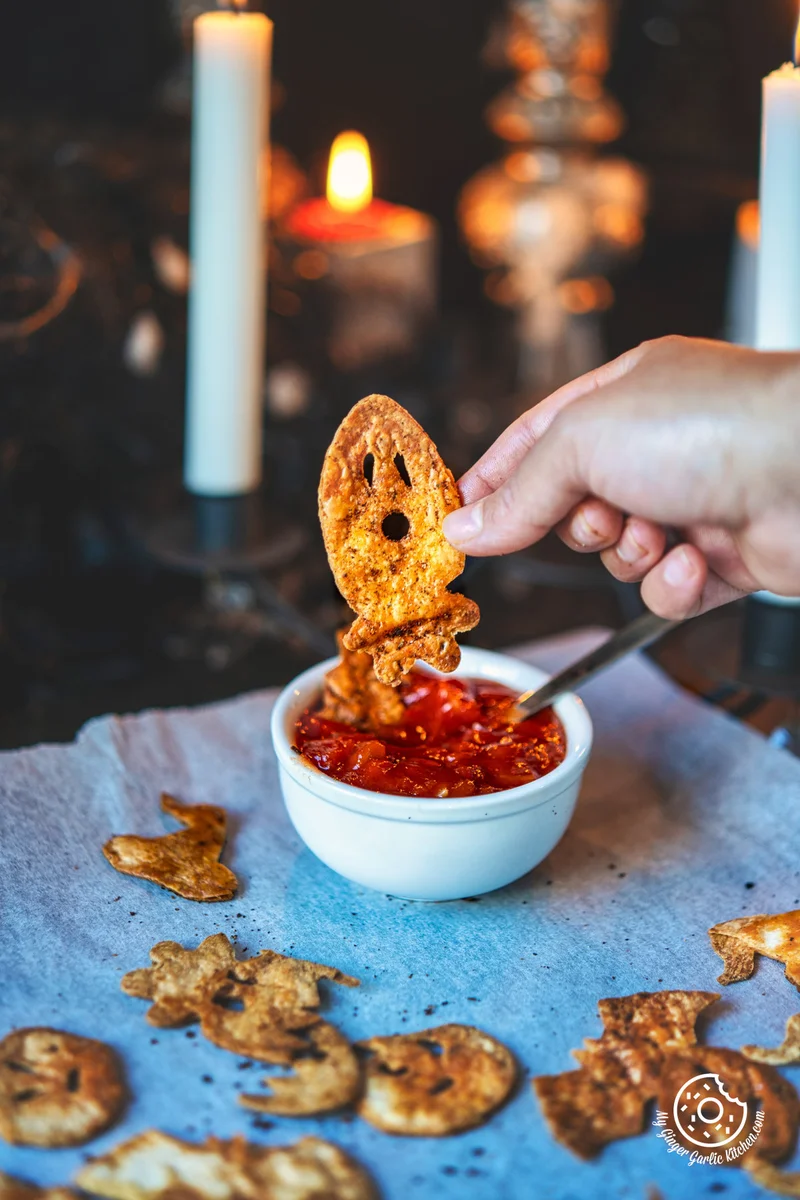
Está procurando um jeito saudável de petiscar no Halloween? Experimente assar suas próprias chips no forno ou prepará-las na air fryer! Esses petiscos são perfeitos para festas.
Ingredientes
- For Halloween Tortilla Chips
- 4 flour tortillas
- 1 tablespoon Mexican spice blend
- Olive oil
- Halloween paper cutouts/spooky cookie cutter
- Piping tip (for crafting the eyes)
- NOTE: Some ingredients can be replaced with their vegan counterparts.
Modo de preparo
- 1
--- Crafting the Spooky Skull Shapes: ---
- 2
Start by creating the spooky skull shapes for your tortilla chips. You can use Halloween-themed paper cutouts or a spooky cookie cutter to achieve the desired shapes, including bat's wings, jack-o'-lanterns, witch's hats, and ghost shapes.
- 3
To make the eyes and mouth, use the piping tip or any small round cutter to create two eye holes. For the mouth, you can also use a small round fluted cutter to shape it without cutting all the way through. Combine 1 tablespoon of Mexican spice blend and 2 tablespoons of olive oil in a small bowl.
- 4
NOTE: Watch the recipe video to learn how to perform these cooking steps.
- 5
--- Baking/Air Frying: ---
- 6
Preheat your oven or air-fryer to 350°F to 175°C and line a baking sheet with parchment paper. Arrange the prepared tortilla chips on the sheet and brush them with the Mexican spice-infused oil. Bake the chips in the preheated oven for 12-14 minutes or until they achieve a golden brown hue, rotating the pan halfway through to ensure even cooking. Once baked, let the chips to cool on a wire rack. Enjoy your homemade Spooky Halloween tortilla chips with your favorite dips or salsas.
- 7
NOTE: Watch the recipe video to learn how to perform these cooking steps.
- 8
--- ENJOY THIS RECIPE ---
- 9
ENJOY THIS RECIPE.
Cozinhe pela receita original
Esta receita é de mygingergarlickitchen.com. No site estão as fotos, as notas e as dicas do autor — o melhor lugar para prepará-la.
Ver a receita em mygingergarlickitchen.com