
Seeded Multigrain Gluten-Free Sourdough Bread
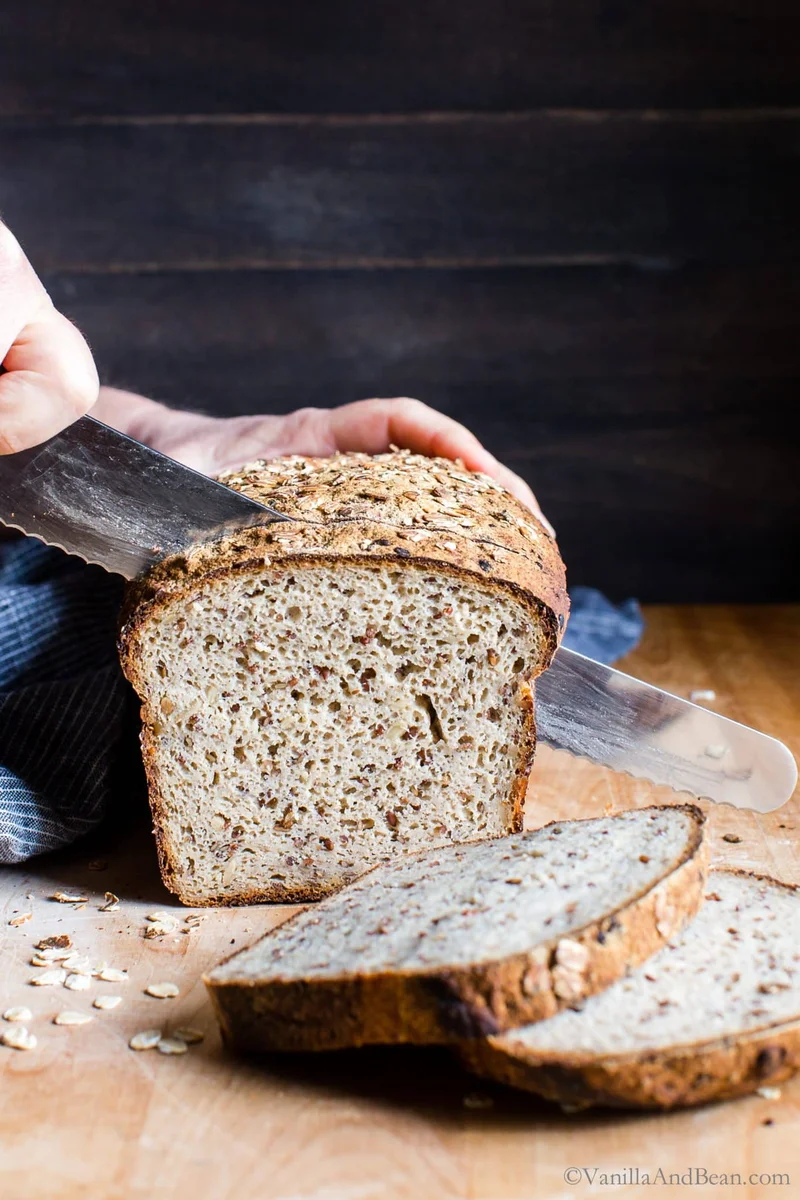
Advance Prep Required - you'll need a gluten free sourdough starter I recommend using a digital scale for best outcome. See blog post and "makers notes" above this recipe to help answer any questions you may have. !! Please note that I do not recommend substituting Psyllium Husk Powder for any other ingredient. Also see note for Psyllium Husk Powder update.Texture rich, flavorful and tender, homemade Seeded Multigrain Gluten-Free Sourdough Bread is gluten free bread you'll look forward to eating! gluten free + vegetarian or vegan | Time to ferment can vary depending on how long your loaf takes to reach the appropriate size. For this loaf, fermentation is about 12-14 hours. Use the time as a guide, not as a determining factor.Baker's Schedule: Friday morning feed your starter. Mix the dough Friday night and ferment overnight. Bake Saturday morning.
📝 Ingredients
- 3 Tbs Whole Flax Seeds
- 3 Tbs Whole Rolled Oats (gluten free)
- 3 Tbs Red or Tricolor Quinoa (rinsed under running water)
- 3 Tbs Hulled Sunflower Seeds
- 1/3 C (80g) Water (room temperature)
- 1/3 C + 2 Tbs (100g) Gluten Free Sourdough Starter (previously fed, and doubled in size)
- 2 1/2 C + 2 Tbs (605g) Water (80F (27C))
- 3 Tbs Maple Syrup (or Honey)
- 1 C (145g) Brown Rice Flour
- 1 C (150g) Millet Flour
- 1 1/4 C (130g) Oat Flour (gluten free )
- 1/2 C + 1 Tbs (80g) Tapioca Flour
- 2 1/4 Tbs Psyllium Husk Powder
- 3 1/2 tsp Fine Sea Salt (or reduce to preference *See note on salt adjustment)
- 1-2 Tbs Whole Rolled Oats (for sprinkling on top, gluten free)
👨🍳 Instructions
- 1--- For the Soaker: ---
- 2Prepare the soaker by placing the flax, oats, quinoa, and sunflower seeds into a small bowl. Pour room temperature water over the top of the soaker. Leave out at room temperature for about 6-8 hours. If you forget to do this, you can pour hot water (hot to touch) over the soaker before you start preparing the ingredients for the bread.
- 3--- For the Dough: ---
- 4Line the inside of a 8.5L x 4.5W x 2.75H inch loaf pan (23cm X 13cm) with criss crossing parchment with enough hangover on all sides to later help shape the dough and to be used as handles for removing the bread from the pan. If you have clips to clip the parchment to the sides, use them.
- 5UPDATE 5/20: Some makers have commented that they "poured" the dough into the baking pan. Please note that the dough should be of a sticky thickish batter-like consistency where it is scraped into the pan and holds together. The dough should not be pourable. In order to achieve this batter-like consistency, Psyllium Husk Powder is essential. I do not recommend substituting this ingredient. Mix the Dough: In a large mixing bowl, add the starter, water and maple syrup (or honey). Whisk until the starter is incorporated. Set aside.In a medium mixing bowl whisk the brown rice flour, millet flour, oat flour, tapioca flour, psyllium husk powder and fine sea salt. Mix throughly so that when the psyllium husk powder hits the water, it wont clump. To the water/starter mixture add the flour mixture. Use a fork to mix the flour into the water until the dough starts to stiffen, about one minute. The dough will feel like a thick batter. Add the soaker and knead the dough with your hand, incorporating the soaker until the mixture is evenly distributed, about one minute. Use the fork to scrape any excess dough off your hands and fingers. The dough will be very sticky. Set the bowl aside for about 10 minutes to rest. It will stiffen a bit as it rests.
- 6Shape and Pan the Dough: There are two ways to approach shaping. a. if you're in a hurry or b. if you have a bit more time and patience. Either will work but I find I get a better shape out of b. (note that a. was used in the images seen above). A. Scrape the batter into the loaf pan. Use a moist rubber spatula (remoisten as needed) to gently shape the top nudging the edges of the loaf inward to produce a nice dome shape loaf bread is known for. This takes a little practice and finessing. Just do the best you can. Use the 'handles' of the parchment and pull opposite sides inwards towards the center of the dough, helping to round and shape the edges. Moisten your fingers or small spatula and smooth the top to rid any lumpy areas. B. A bench scraper for this method is needed. Moisten your work surface with a bit of water (I use a spray bottle and sprits it a few times). With moistened fingers, nudge the dough out of the bowl and onto the moist surface. The dough will be very sticky. Re-moisten your hands and pat the dough into a rough rectangle/log a little smaller than the size of the loaf pan using the bench scraper as needed to move the dough. Pat and smooth the edges as needed using wet hands (no flour here), rocking the dough back and fourth to help shape it, smoothing and rounding the top into a rectangular dome. This takes a little practice and finessing, just do the best you can. Using one swift move, scoop up the shaped dough with a bench scraper and transfer it to the loaf pan. Use the 'handles' of the parchment and pull opposite sides inwards towards the center of the dough, helping to round and shape the edges. Do this several times. Moisten your fingers or small spatula and smooth the top to rid any lumpy areas. Use a moist rubber spatula to gently shape the top nudging the edges of the loaf inward to produce a nice dome shape loaves of bread are known for.Now is a good time to refresh (feed) your starter and store it for next time.
- 7Bulk Ferment: Remove the clips from the pan if using. Cover the dough with a wet tea towel and allow the dough to ferment overnight at room temperature (it's okay if the wet tea towel touches the top of the loaf). Fermentation will take anywhere between 12-14 hours depending on how active your starter is and ambient temperature. In my chilly kitchen at 66F, the dough takes about 14 1/2 hours to rise overnight. There is no proof for this recipe. Go right into baking the loaf after bulk fermentation. The loaf is ready to bake when the dough increases to 1 1/2 times in size and has risen to about 1.1/2" (3.8cm) above the lip of the pan at the center. The dough will spring back when gently pressed on top.
- 8Bake the Loaf: Place a oven rack in the center of the oven and preheat the oven to 550F (288C). Lightly spray or brush the top of the dough with water and sprinkle 1-2 Tbs of rolled oats over the top. Decrease the oven temperature to 475F (246C) and bake the loaf 55-60 minutes or until the internal temperature of the bread is between 200F-205F. If the bread starts getting too dark on top, tent the bread with foil. The bread pictured here is untented. After 10 minutes out of the oven, transfer the bread to a cooling rack. Cool completely, at least for two-three hours, better if cured overnight, before slicing into it. You'll notice the bread is very hard, but will soften as it cools.
- 9How to Store and Enjoy!: After the bread is completely cool, slice it with a serrated knife. The slices can be stored at room temperature in a closed container for up to three days or frozen for longer storage. For freezer storage, slices can go from freezer to toaster directly.You'll notice the interior of the bread to be tacky. This is normal. I find this gluten free sourdough needs to be toasted before it's enjoyed... sometimes double toasted to bring out its best flavor and texture.
About the Chef & Original Recipe
This recipe was published by Traci York on vanillaandbean.com. Visit the original source for step-by-step photos, chef notes and additional details.