
Keto Garlic Bread
Nutrition per Serving
257
Calories
9g
Protein
11g
Carbs
19g
Fat
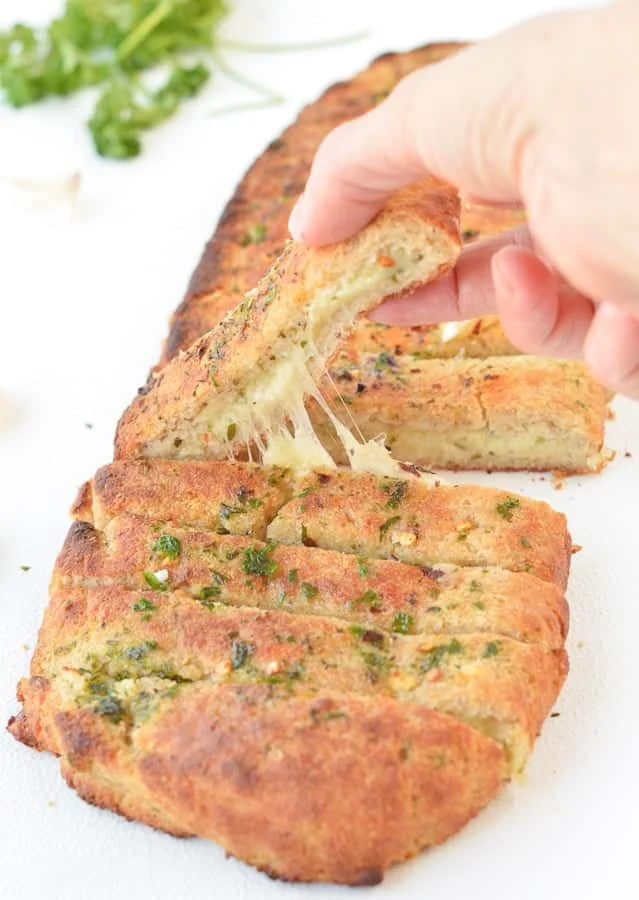
An easy Keto garlic bread recipe with almonds ready in 30 minutes for a quick side dish or appetizer to share with friends.
📝 Ingredients
- 2 teaspoons Dried Yeast (or yeast free option, replace by 1/2 tablespoon of baking powder.)
- 2 teaspoons Maple Syrup (or inulin (omit this ingredient if you don't use dried yeast))
- 1/2 cup Water
- 3 tablespoons Extra Virgin Olive Oil
- 2 large Eggs (at room temperature)
- 1/2 cup Coconut Flour
- 1/4 cup Almond Flour
- 4 tablespoons Whole Psyllium Husk (*see note on how to choose husk )
- 1/4 teaspoon Salt
- 1/2 teaspoon Garlic Powder
- 1/4 cup Unsalted Butter
- 3 Garlic Clove (crushed)
- 2 tablespoons Fresh Parsley (finely chopped)
- 1-2 teaspoons Extra Virgin Olive Oil (to rub on your dough an hands)
- 1/2 cup Grated Mozzarella (or cheddar)
- 1/2 teaspoon Chili Flakes (optional)
- 1/2 teaspoon Dried Oregano
👨🍳 Instructions
- 1--- Proofing the yeast - or go to next step for yeast-free recipe ---
- 2Preheat oven to 400°F (200°C).
- 3Proof Yeast: If using dry yeast, start by proofing the yeast. Combine dried yeast with maple syrup (don't worry, no sugar will be left in the recipe, the yeast will consume all of it!) and lukewarm water (think bath temperature, not boiling). Stir, set aside 10 minutes until foamy.
- 4--- Make Dough ---
- 5Add druy ingredients: In a large mixing bowl, add the dry ingredients together: almond flour, coconut flour, psyllium husk, salt, and garlic powder. If you choose to NOT use dried yeast, add 1/2 tablespoon of baking powder to the dry ingredients.
- 6Stir well to evenly combine the flours. Set aside.
- 7Get yeast: Bring back the bowl with the proofed yeast and beat in the eggs and olive oil. If you didn't use yeast, only beat eggs and olive oil with 1/2 cup of the lukewarm water.
- 8Pour liquid ingredients: Pour the liquid ingredients into the bowl with the flour. Combine with a spatula at first, then knead the dough with your hands, squeezing the dough to activate the fibers from the husk. The dough will be wet at first, and it takes about 90 seconds to form a dough that can be shaped into a ball. It is slightly sticky, so you can rub your hands with 1/2 teaspoon of olive oil.
- 9Cover: Put the dough ball into the mixing bowl, cover the bowl with a towel, and set it aside at room temperature for 10 minutes.
- 10Prepare Garlic Butter: In a small mixing bowl, combine the melted butter, crushed garlic, and finely chopped parsley. Set aside.
- 11Rub Dough: Remove towel from the bowl, slightly rub dough ball with 1/2 teaspoon olive oil, then knead dough 30 seconds-1 minute to remove air. Place the dough ball in the center of an oiled piece of parchment paper.
- 12Press Dough: Press the dough ball roughly into a thick disk, then drizzle 1/2 teaspoon of olive oil on top of the disc. Press again to shape the dough in an oval shape.
- 13Make Disc: Place a piece of parchment paper on top of the dough and roll to extend the oval shape into a thinner oval disc.
- 14Add Garlic Butter: Peel off the top piece of parchment paper and using a pastry brush/or spoon, spread half the amount of garlic butter all over the rolled dough.
- 15Add Cheese: Top with grated mozzarella (or cheddar) on half of the dough.
- 16Fold the dough into a pocket to encase the cheese and seal the edges.
- 17Make marks: Using a sharp knife, make marks all over the bread without cutting them fully.
- 18Brush the rest of the garlic butter on top of the bread and season with chili flakes and dried oregano if desired.
- 19Bake the garlic bread at 200°C (400°F) for 15-20 minutes or until golden on top and crust forms.
- 20Cut into pieces following the marks you made before and serve immediately with a dipping sauce of your choice or as a side dish.
About the Chef & Original Recipe
This recipe was published by sweetashoney.co. Visit the original source for step-by-step photos, chef notes and additional details.
Source: sweetashoney.co