
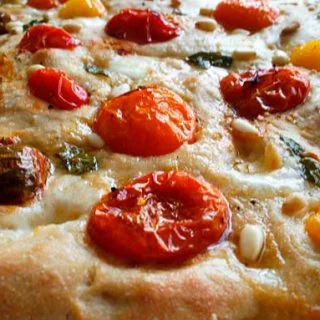
Heirloom Tomato & Mozzarella Fococcia
Nutrition per Serving
—
Calories
—
Protein
—
Carbs
—
Fat
This focaccia would be great served at lunch with a salad, or cut into wedges as party food.
📝 Ingredients
- 2 Teaspoons Instant Yeast
- 1 1/2 Cups Warm Water
- 4 to 4 1/2 Cups All-purpose, Unbleached Flour (Or Two Cups White Wheat Flour And Two Cups All-Purpose)
- 1 Teaspoon Salt
- 3 Tablespoons Olive Oil
- 10 Small Heirloom Tomatoes, Halved
- 6 Fresh Basil Leaves
- 1 Cup Cubed Mozzarella
- Coarse Salt
- 1/4 Cup Pine Nuts
👨🍳 Instructions
- 1In a large bowl, combine the flour, salt,...: In a large bowl, combine the flour, salt, yeast and enough water to create a soft dough.
- 2Mix thoroughly with a wooden spoon and then...: Mix thoroughly with a wooden spoon and then your hands.
- 3Transfer to a floured work surface and knead...: Transfer to a floured work surface and knead by hand for about 5 minutes or until smooth.
- 4Place in a well oiled bowl, cover with...: Place in a well oiled bowl, cover with plastic wrap, and let rise until doubled, about 1 1/2 hours.
- 5Punch down and place on an oiled baking...: Punch down and place on an oiled baking sheet, forming into an oval or circle.
- 6Space the tomatoes evenly across the surface of...: Space the tomatoes evenly across the surface of the focaccia, then sprinkle the basil leaves, and pine nuts.
- 7Push the mozzarella cubes into the dough.
- 8Dimple the top surface with your finger tips,...: Dimple the top surface with your finger tips, and then drizzle with the oil and sprinkle with coarse salt.
- 9Let rise another 15 to 20 minutes while...: Let rise another 15 to 20 minutes while you preheat the oven to 425 degrees F.
- 10Bake about 20 minutes or until golden.
- 11Serve warm or at room temperature.
About the Chef & Original Recipe
This recipe was published by Deborah on italianfoodforever.com. Visit the original source for step-by-step photos, chef notes and additional details.
Source: italianfoodforever.com