
Honey Quinoa Bread (Gluten-Free, Dairy-Free)
Nutrition per Serving
247
Calories
6g
Protein
40g
Carbs
7g
Fat
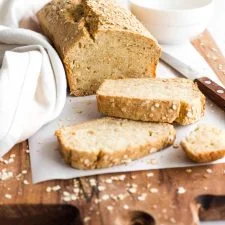
Super easy to make, this honey quinoa bread is studded and topped with quinoa flakes for a delicious boost of protein, flavor and texture. This quinoa quick bread bakes up in under an hour, and is perfect for toasting and eating with jam, so bake a loaf anytime you want homemade bread! Totally gluten-free and dairy-free too.
📝 Ingredients
- 2 1/3 cups gluten-free all-purpose flour
- 3/4 teaspoon xanthan gum (leave out if your flour blend already includes it)
- 1 cup + 2 tablespoons quinoa flakes, divided
- 2 1/2 teaspoons baking powder
- 1 teaspoon salt
- 1 cup plain coconut yogurt
- 1 large egg
- 1/4 cup coconut oil, melted
- 1/4 cup honey
- 3/4 cup water
👨🍳 Instructions
- 1Preheat and Grease: Preheat oven to 350F and grease a 9×4″ metal loaf pan and adjust the oven rack to the center position.
- 2Whisk Dry Ingredients: Sift the gluten-free all-purpose flour, xanthan gum(if using), 1 cup quinoa flakes, baking powder, and salt together in a large bowl and whisk to combine.
- 3Mix Wet Ingredients: Beat the egg, yogurt, melted coconut oil, water and honey together until well blended.
- 4Form the Batter: Slowly add the wet ingredient to the bowl with the dry ingredients and stir until just the batter is just combined – it will be a thick batter (do not overmix or the batter may become too tough).
- 5Transfer Batter to Pan: Transfer the batter to the prepared loaf pan and spoon the top with a spatula.
- 6Sprinkle with Quinoa Flakes: Sprinkle the rest of the quinoa flakes evenly over the batter.
- 7Bake Until Golden: Bake for 40 to 45 minutes until the quinoa bread is golden brown on top and a toothpick inserted in the middle comes out clean.
- 8Cool Completely before Slicing: Let the bread cool for 10 minutes in the pan before removing and then completely on a cooling rack before slicing into it.
About the Chef & Original Recipe
This recipe was published by Felicia Lim on dishbydish.net. Visit the original source for step-by-step photos, chef notes and additional details.
Source: dishbydish.net