
Gluten-free Almond Sponge Cake - Keke Kōpunga Aramona Kore-Wīti
Nutrition per Serving
—
Calories
—
Protein
—
Carbs
—
Fat
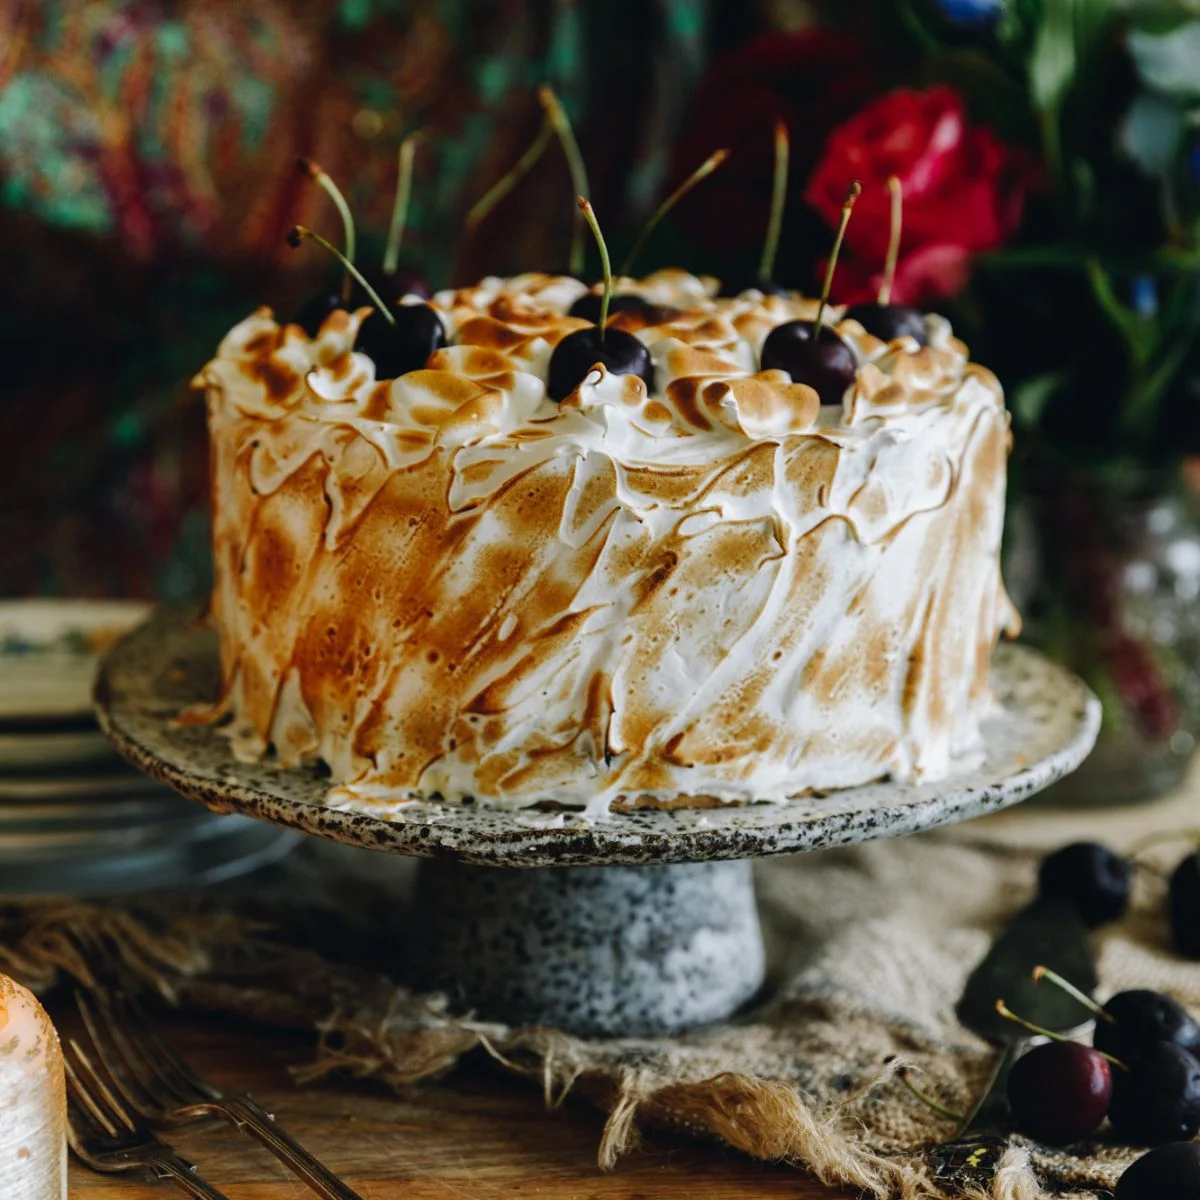
A light and fluffy gluten-free almond sponge cake, layered with whipped cream, fresh fruit, passionfruit syrup and lemon zest. Finished with torched Swiss meringue.
📝 Ingredients
- 90 g pata (butter)
- 6 hēki (eggs, size 6 eggs)
- 2/3 C (150 g) huka one (caster sugar)
- 1/2 tsp tote (salt, fine)
- 1 tbsp wanira (vanilla)
- 2 C (240 g) peru oneone (ground almonds)
- 1/3 C (40 g) C puehu kānga (cornflour)
- 3/4 tsp pēkana paura (baking powder)
- 1/3 C (75 g) huka one (caster sugar)
- 1 2/3 C (400 ml) kirīmi (cream, chilled)
- 1/2 C (100 g) marscapone (chilled)
- 2 tsp (10 ml) wanira (vanilla)
- 1/3 C (55 g) puehu huka (icing sugar)
- 28 (300 g) tieri (cherries, fresh) If cherries are not in season you can used bottled cherries, fresh or canned fruit or store bought fruit compote.
- 6 tbsp ranu kōhia (passionfruit syrup, store-bought)
- Kiri rēmana (lemon zest, of 1 1/2 lemons)
- 1 quantity Swiss Meringue
👨🍳 Instructions
- 1--- Preheat the Oven: ---
- 2Preheat the oven to 160 °C, fan bake setting or 170 °C bake setting.
- 3Grease two 19 cm or 20 cm sponge or cake tins with butter. Line them with baking paper on the base and up the sides.
- 4--- Brown the Butter: ---
- 5Add the chopped pata (butter) in to a medium sized pot or pan. Set over medium heat. First, melt the butter, stirring occasionally.
- 6As the heat continues the milk fats will start to separate (these are the white, floaty bits). Stir occasionally here so nothing sticks to the bottom of the pot.
- 7Keep it on the heat until the butter starts to foam. Stir it a little bit until the brown bits float to the top. It should smell nutty. (Use the pictures and video as a guide). From here, stir it a little for another 30 seconds or so, so the butter browns further.
- 8Remove from the heat, pour in to a small bowl and leave to the side to cool.
- 9--- Seperate the Eggs: ---
- 10Separate the hēki (eggs). Add the tōhua hēki (egg yolks) in to a large bowl and add the kahu hēki (egg whites) in to a medium bowl.
- 11--- Whip the Egg Yolks: ---
- 12Add the first measure of huka one (caster sugar), wanira (vanilla) and tote (salt) in to the bowl of tōhua hēki (egg yolks).
- 13Whip it all on high for 3 minutes until thick, fluffy and pale in colour.
- 14--- Sift in the Dry Ingredients: ---
- 15Sift in the peru oneone (almond meal), puehu kānga (cornflour) and pēkana paura (baking powder). Whētuihia (fold it together). The mixture will be quite tight at this stage but trust me, it will be ok!
- 16--- Whip the Egg Whites: ---
- 17Add the second measure of huka one (caster sugar) in to the kahu hēki (egg whites) that you prepared earlier.
- 18Whip it for 3 - 4 minutes on medium-high until stiff peaks form.
- 19--- Fold in two thirds of the Meringue: ---
- 20Add a third of the merenge (meringue) in to the egg yolk mixture. Fold it in and watch as the mixture beings to loosen.
- 21Add another third of the merenge (meringue) and fold it in.
- 22--- Add the Brown Butter: ---
- 23Drizzle in half of the cooled pata parauri (brown butter) around the edge of the bowl, folding until it is incorporated.
- 24Add the second half of the pata parauri (brown butter) and fold it all together.
- 25--- Fold in the final third of the Meringue: ---
- 26Add the final third of the merenge (meringue) and fold it in.
- 27--- Bake the Sponge Cakes: ---
- 28Divide the mixture between the two prepared tins and spread it out evenly.
- 29Bake for 30 minutes.
- 30--- Cool the Cakes: ---
- 31As soon as you remove the sponges from the oven, pull the baking paper away from the edges of the cakes before they cool. This helps the cakes keep their shape.
- 32Remove them from the tins after cooling for 5 minutes and transfer to a cooling rack. Leave them to cool for 20 minutes. These can also be made a day ahead and kept in a sealed container in the cupboard until needed.
- 33--- Make the Stable Cream: ---
- 34Make one quantity of my Stable Whipped Cream recipe according to the instructions.
- 35--- Assemble the Cakes: ---
- 36Note: This assembly is for the four layered cake. You can just do two layers and half of the filling ingredients inside or just keep the ratios the same and make them thick layers. Kei a koe te tikanga - it is up to you!
- 37--- Layer the first Cake: ---
- 38Take one of the keke (cakes) and place it on to a serving plate or cake stand.
- 39Cut the cake horizontally. Remove the top piece and leave it to the side.
- 40Add around ⅔ cup of the kirīmi (cream) to the first keke (cake).
- 41--- Add the Cherries and Passionfruit: ---
- 42Remove the pips from the tieri (cherries), if you are using them. Keep 8 tieri (cherries) whole for the top of the cake. Slice the rest in to thin slices and place around 7 cherries worth of slices on to the keke (cake).
- 43Drizzle over 2 tbsp of ranu kōhia (passionfruit syrup).
- 44Using a fine grater, grate over kiri rēmana (lemon zest) of a third to half a lemon.
- 45--- Add the Second Layer of Sponge: ---
- 46Add the second layer of keke (cake) and repeat the process with the same amount of kirīmi (cream), kōhia (passionfruit) and kiri rēmana (lemon zest).
- 47Cut the second keke (cake) horizontally.
- 48--- Layer the Second half of the Cake: ---
- 49Place the third piece of keke (cake) on top. Add the same amount of kirīmi (cream), kōhia (passionfruit) and kiri rēmana (lemon zest). Add the final piece of keke (cake) on top.
- 50Cover the whole cake with the remaining kirīmi (cream). You can top it with your favourite fresh fruit at this stage if you want to.
- 51--- Serve: ---
- 52It is ready to eat like this if you want to. It will keep well in the fridge (uncut) for 24 hours before serving.
- 53--- Decorate with Swiss Meringue: ---
- 54If you want to create a slightly more dramatic cake like I did, whai mai i ahau (follow me)!
- 55Make one quantity of my Swiss Meringue recipe.
- 56Once it is made, add it directly on to the cream covered sponge cake.
- 57Refer to the video on how I created the simple textured pattern. If you want to, using a kitchen blow torch, toast the merenge (meringue) for even more drama.
- 58Finish it off with the reserved fresh tieri (cherries) like I did or any of your favourite fruit.
- 59--- Chill the Cake: ---
- 60Chill in the fridge for 2 hours to allow the flavours to develop and the meringue to set. This can also be refrigerated for up to 24 hours before serving. Anything beyond that and the merenge (meringue) will start to loose its hold.
- 61Due to the cream and fresh fruit in the cake, eat it within two days of making and store it in the fridge.
About the Chef & Original Recipe
This recipe was published by whanaukai.nz. Visit the original source for step-by-step photos, chef notes and additional details.
Source: whanaukai.nz