
Soft Fluffy Steamed Bao Buns Recipe and Video (Baozi/Mantou)
Nutrition per Serving
149
Calories
4g
Protein
29g
Carbs
2g
Fat
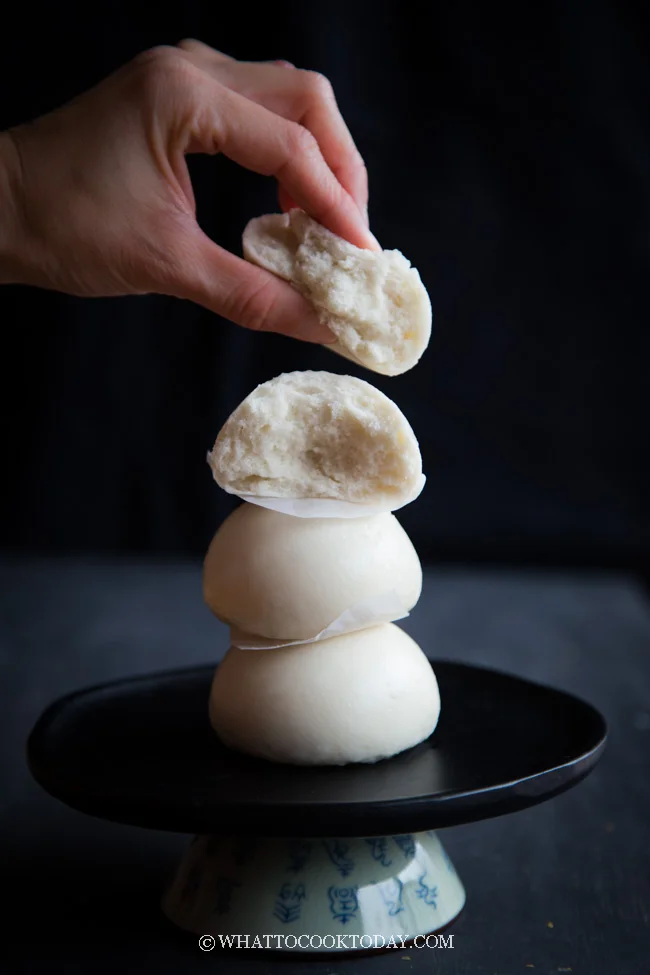
Learn how to make basic soft fluffy Chinese bao buns that can be made with or without filling or different shapes and flavors as you wish. All the tips you need to know and a step-by-step video to help you make smooth soft steamed buns with this recipe. The recipe also includes yudane or tangzhong method to extend the steamed buns' shelf life.
📝 Ingredients
- 300 g all-purpose flour (plus more for dusting)
- 60 g Wheat starch (see notes 1)
- 180 g all-purpose flour (plus more for dusting)
- 180 g cake flour
- 4 g Instant yeast (see notes 2.3,4.5)
- 30 g sugar (see notes 6)
- 2 Tbsp cooking oil
- 1/2 tsp salt
- 1 tsp baking powder
- 200 g cold milk (plus more as needed, see notes 7)
👨🍳 Instructions
- 1For tangzhong or yudane version, you can find the recipe in this post
- 2This recipe only requires the dough to be proofed one time.
- 3--- Prepare the dough with a machine: ---
- 4Place the flour and starch, instant yeast, sugar, salt, baking powder, milk and oil in a mixing bowl of a stand mixer fitted with a dough hook attachment. Give it a stir using the hook to roughly combine so the dry ingredients won't "fly" all over the place when you start the machine
- 5You may or may not need more liquid. If the dough feels dry and stiff, add a bit more milk, one teaspoon at a time. Continue to knead at low speed (speed 2 on KA) for 12-15 minutes or until the dough is smooth and elastic. It may feel slightly sticky to the touch and that's okay.
- 6You don't need to develop a window pane here but the dough needs to be smooth and elastic. Oil your hands a bit to help you pick up the dough and to prevent the stickyness
- 7--- Prepare the dough by hands: ---
- 8Place the flour/starch combination (either option 1 or 2), instant yeast, sugar, salt, baking powder, and oil in a mixing bowl. Start with 180 ml of liquid, most likely you will need more liquid than called for in the recipe. I usually need about 180-200 ml of liquid. Mix until you get a rough dough (it's not going to be smooth yet). Cover and rest it for 15 minutes
- 9Then go back and knead it. You'll be surprised by how easier it is to knead it now. Knead until the dough is smooth and pliable. The kneading motion is like washing a cloth by hands. At any point during kneading, you can always stop and rest the dough if you find it hard to knead and so much resistant. This is to relax the gluten. Then go back to knead again and you'll be surprised by the difference it makes by just resting the dough before kneading again. It's easier for you too. You want the dough that is smooth, silky, and elastic. Just to warn you that it's going to take some time to knead by hands. It may take 20-30 minutes total of time to knead by hands
- 10--- If not using the dough on the same day: ---
- 11You can prepare the dough as directed above but use less yeast (decrease to 1/2 teaspoon). Then round up the dough and put in a lightly oiled air-tight container and put it in the fridge immediately for no more than 24 hours. We are delaying the fermentation here.
- 12When you are ready to fill and shape the dough, remove from the fridge and divide the dough as directed below. There is no need to let the dough come to a room temperature
- 13--- If you are just making plain steamed buns with no filling (round shape): ---
- 14Lightly dust your work surface with a bit of flour. Divide the dough into 10-12 equal portions.
- 15Flatten and gather the edge to round them up into dough balls. Roll the dough into a smooth round ball in between the palm of your hand or as I did in the video. REALLY make sure the dough is smooth.
- 16Cup the dough with both palms and move the dough in a circular motion to shape it taller. This part is important so your steamed buns come out tall instead of spreading to the side after steaming
- 17Place on a piece of parchment paper. Lightly dab the surface of the bun with some milk using your finger to smooth the surface. You can also mist with some water using a spray bottle. Loosely cover with clean kitchen towel to prevent drying. Work with another dough and do the same. Proceed to proofing after that
- 18--- If you are going to make steamed buns with filling: ---
- 19Lightly dust your work surface with a bit of flour. Divide the dough into 10-12 equal portions. Flatten and gather the edge to round them up into dough balls. Cover and rest the dough for 5 minutes. This is not to proof the dough. It shouldn't double in size. This is to relax the gluten for easier shaping and rolling the dough, then proceed to the next step that's applicable to you
- 20Work with one dough at a time. Flatten the dough with your palm and then use a rolling pin to roll it out to form a circle about 4-5 inches, with a slightly thicker middle part. This is to support the weight of the filling. Don't roll the dough too thin. If you roll the dough too thin, the filling might make the steamed buns "wrinkle" later when you steam. Place the filling at the center and then gather the sides to enclose the bun and pinch to seal. Flip the bun so the seam side is down now
- 21Cup the dough with both palms and move the dough in a circular motion to shape it taller. This part is important so your steamed buns come out tall instead of spreading to the side after steaming. Repeat with the rest of the dough. Cover with a clean kitchen towel and proceed to proofing
- 22--- For mantou shape: ---
- 23Roll the dough into a long log and use a dough cutter to cut into 8-10 equal portions using a serrated knife is best so it won't squish the dough down. Lightly dab the surface of the bun with some milk using your finger to smooth the surface or mist with some water using a spray bottle. Proceed to proofing step below
- 24--- Proofing: ---
- 25Let the dough rise at room temperature or at a warm place. If it's winter where you are, you can use your oven "bread proof" function to let them proof in there, or simply turn on your oven to the lowest temperature and then turn off and after 15 minutes, place the shaped buns in there to let them proof. They won't necessarily double in size, but at least puff up to about 50% of the original size. This may take about 1 hour or longer at a warm temperature. If your dough has been in the fridge, it will take much longer to proof the dough. Don't go by the time however. Observe the dough instead!
- 26For active dry yeast and fresh yeast, you may need a bit longer for it to proof compare to instant yeast. If you use more sugar in the recipe, you may need to proof a bit longer too. Do not overproof your dough however
- 27It will leave an indentation but it will spring back slowly. This dough is perfectly proofed. If it springs back right away, it needs to be proofed a bit longer. If it never springs back, then you have over-proofed the dough. Loosely cover them with plastic wrap and put the over-proofed buns in the fridge to slow down the proofing while waiting for the steamer
- 28--- Steaming: ---
- 29Most likely your steamer won't be able to accommodate steaming all buns at one go. You may need to steam in 2-3 batches, which means, the rest of the batches will sit longer and continue to proof while waiting for the steamer. Here's what you can do: Make sure to cover them with plastic wrap and then place them in the refrigerator to slow down the yeast activity until they are ready to be steamed
- 30Fill up the steamer with water but do not turn on the stove yet. Carefully arrange the proofed buns in the steamer, giving about 2 inches of space in between as they will expand quite a bit. Cover with a lid wrapped with a cloth to prevent condensation from dropping on the surface of the buns. If you use a bamboo steamer, you don't need to wrap the lid as bamboo steamer absorbs liquid
- 31Please note that I use the largest burner on my stove. Different sizes of burners will produce different amount of heat, so use your largest burner. TURN THE HEAT TO MEDIUM (6/10)
- 32When the water comes to a simmer, crack the lid open about 1/2 inch gap and start the timer. Steam with the lid cracked open like that for 10 minutes
- 33After steaming, turn off the heat. DO NOT OPEN THE LID of the steamer. Let the buns sit there for 3 minutes. The buns will not sink or wrinkle due to the sudden change in temperature
- 34Proceed with the next batch and steam with the same method and setting as I mentioned above. You don't have to wait for the water in the steamer to cool down to start. Just turn on the stove to medium heat, crack the lid open immediately and the time starts when water is back to a simmer again
- 35--- Serve warm or cool down: ---
- 36Serve them while they are warm
- 37--- Storing: ---
- 38If you make extra and plan to store them, let the already steamed buns cool down completely and then place them on a baking sheet, not touching each other, and then put the entire tray inside the freezer for about 1 hour. They will harden, but not completely frozen yet. Transfer to a freezer bag and they will not stick to each other anymore. Try not to keep for more than 1 month
- 39--- Reheating: ---
- 40They can go straight from freezer to steamer when you are ready to eat them. Steam on high heat for 5 minutes and they are as good as new
About the Chef & Original Recipe
This recipe was published by whattocooktoday.com. Visit the original source for step-by-step photos, chef notes and additional details.
Source: whattocooktoday.com