
White Layer Cake with Buttercream Frosting
Nutrition per Serving
567
Calories
4g
Protein
80g
Carbs
27g
Fat
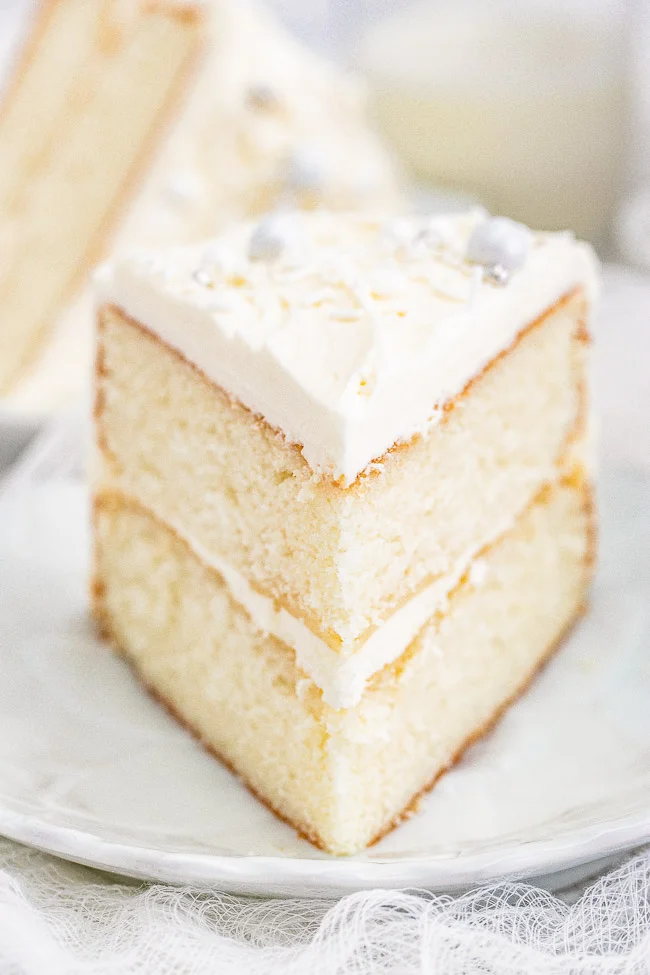
🎂🙌🏻 A classic, white, two-layer cake recipe! The cake has a light texture that's complemented by super light and fluffy buttercream that's not too sweet. Learn how to make THE BEST white cake that's fancy enough to serve at your most special celebrations and events!
📝 Ingredients
- 1 cup whole milk (room temperature (65°F))
- 6 large egg whites (room temperature (65°F))
- 1 teaspoon clear vanilla extract (clear is likely "imitation" vanilla extract; real may be used noting it will yellow the cake)
- 1 teaspoon almond extract (optional but highly recommended)
- 2 1/4 cups cake flour (all-purpose not recommended)
- 1 tablespoon baking powder
- 1/2 teaspoon fine sea salt
- 3/4 cup unsalted butter (room temp (65°F))
- 1 3/4 cup granulated sugar
- 1 1/2 cups unsalted butter (softened)
- 6 cups confectioners' sugar (sifted*)
- 1 teaspoon fine sea salt
- 1 1/2 teaspoons clear vanilla extract
- 1 1/2 teaspoons almond extract
- 3 tablespoons whole milk
- Sprinkles for decorating (optional)
👨🍳 Instructions
- 1Prepping Cake Pans - Preheat the oven to 350°F. Spray two 9-inch round cake pans and with cooking spray. Take a pastry brush and brush the spray all over the pans to make sure they are evenly coated. Place a parchment paper liner in the bottom of the pans, it does not need to go up the sides. Grease the top of the parchment papers by spraying them with cooking spray and then brushing it lighting; set pans aside.
- 2Cake - To a large bowl, add the milk, egg whites, vanilla extract, optional almond extract*, and whisk until combined; set aside.
- 3To a separate large bowl, add the cake flour, baking powder, sea salt, and whisk until combined; set aside.
- 4To the bowl of a stand mixer fitted with the paddle attachment or in a large bowl with an electric hand mixer, add the butter and sugar. Beat on medium speed until light and fluffy, about 3 minutes. Stop and scrape down the sides.
- 5Add half of the flour mixture to the mixing bowl and beat momentarily until just incorporated. Stop and scrape down the sides.
- 6Add half of the milk mixture to the mixing bowl and beat momentarily until just incorporated. Stop and scrape down the sides.
- 7Add the remaining flour mixture and beat momentarily until just incorporated. Stop and scrape down the sides.
- 8Add the remaining milk mixture to the mixing bowl and beat momentarily until just incorporated. Stop and scrape down the sides.
- 9Divide the cake batter between the two cake pans. You can do this by weight or I like to use a large cookie scoop and scoop it evenly into each pan, one scoop by one scoop, to make sure the same amount of batter is in each pan.
- 10Bake for 20 to 25 minutes, or until just done. The cakes are ready and done when a toothpick inserted into the center comes out mostly clean, with a few crumbs stuck to the toothpick is ideal. You do not want the cakes to brown too much because dark sides or tops will be evident when you slice into the cake, even after it's frosted the dark edges will be notable.
- 11Place the pans onto a wire rack and cool for 10 minutes before turning the cakes out and allowing them to completely on the wire rack, at least 2 hours or more.
- 12Buttercream Frosting - To the bowl of a stand mixer with the paddle attachment or into a large bowl with an electric hand mixer, add the butter and whip on medium speed until completely smooth.
- 13Turn the speed down to low and being adding spoonfuls of the powdered sugar to the mixing bowl, one spoonful at a time. You want to make sure the confectioners' sugar gets incorporated fully before adding the next spoonful. The overall process will take some time, but it is worth it to get super fluffy buttercream. Scrape down the sides as needed.
- 14Add the vanilla and almond extracts and beat momentarily on medium-low speed until combined.
- 15Add the milk and beat momentarily on medium-low speed until combined.
- 16Turn up the speed to medium-high and whip the frosting for 3 minutes. It will become super light and fluffy.
- 17Cake Assembly - If there is any doming on the tops of the baked cakes, carefully cut any away so it is flat.
- 18Take a cake stand, plate, or cake board and place a tablespoon dollop of buttercream in the center. This helps keep the cake from moving around.
- 19Place one of the cakes, bottom side down onto the buttercream, centering the cake on your serving platter.
- 20Place 1 cup of buttercream on top of the cake and smooth it out to the edge.
- 21Invert the other cake and place it top-side down onto the buttercream. C
- 22Crumb coat - Place about 1 cup of the buttercream into a separate dish. This ensures you don’t get any crumbs in your big batch of buttercream.
- 23Carefully smooth out a layer of buttercream all over the cake. It doesn’t have to be thick but we want to make sure to coat the cake completely. I like to press in some of the buttercream into the sides where the two cakes meet where there can sometimes be a gap.
- 24Place the cake into the fridge for at least 2 hours so the crumb coat can set. I like to do this step overnight so I am not overwhelmed by the frosting and decorating process.
- 25After at least two hours and your crumb coat has set, frost the outside of the cake. I like a rustic look so it appears homey, and ultimately is less stressful since I don't feel pressure to create perfectly as-smooth-as-glass frosting, but you can decorate your cake however you wish.
- 26Optionally, add sprinkles as desired.
- 27Serving/Storing - I recommend allowing the cake to come to room temp before serving it because it seems to taste a bit moister. An assembled two-layer cake will keep airtight in the fridge for up to 1 week, although I find it tastes best in the first few days but take note, you can bake/assemble/frost this easily 24-36 hours before an event and store it at room temp since buttercream frosting is safe at room temp for up to 3 days because of the high sugar content.
- 28Baked, but unfrosted, cakes will keep airtight in the freezer for up to 3 months, and buttercream frosting will also keep for about 3 months in the freezer, so you may consider baking the cakes themselves, cooling them, freezing them, making the frosting, and then freezing everything separately. And then frosting/decorating the cakes if you need to be able to serve dozens and dozens of people all at once and can't possibly bake enough cakes all at once to serve everyone (such as an engagement party or even a wedding); and in situations like this the freezer therefore is a good plan-ahead option so you can prebake off some of the cakes and premake some frosting.
- 29Recipe is inspired from Cook's Country however the assembly process of the cake is my own as well as the buttercream frosting recipe and technique.
About the Chef & Original Recipe
This recipe was published by Averie Sunshine on averiecooks.com. Visit the original source for step-by-step photos, chef notes and additional details.
Source: averiecooks.com