
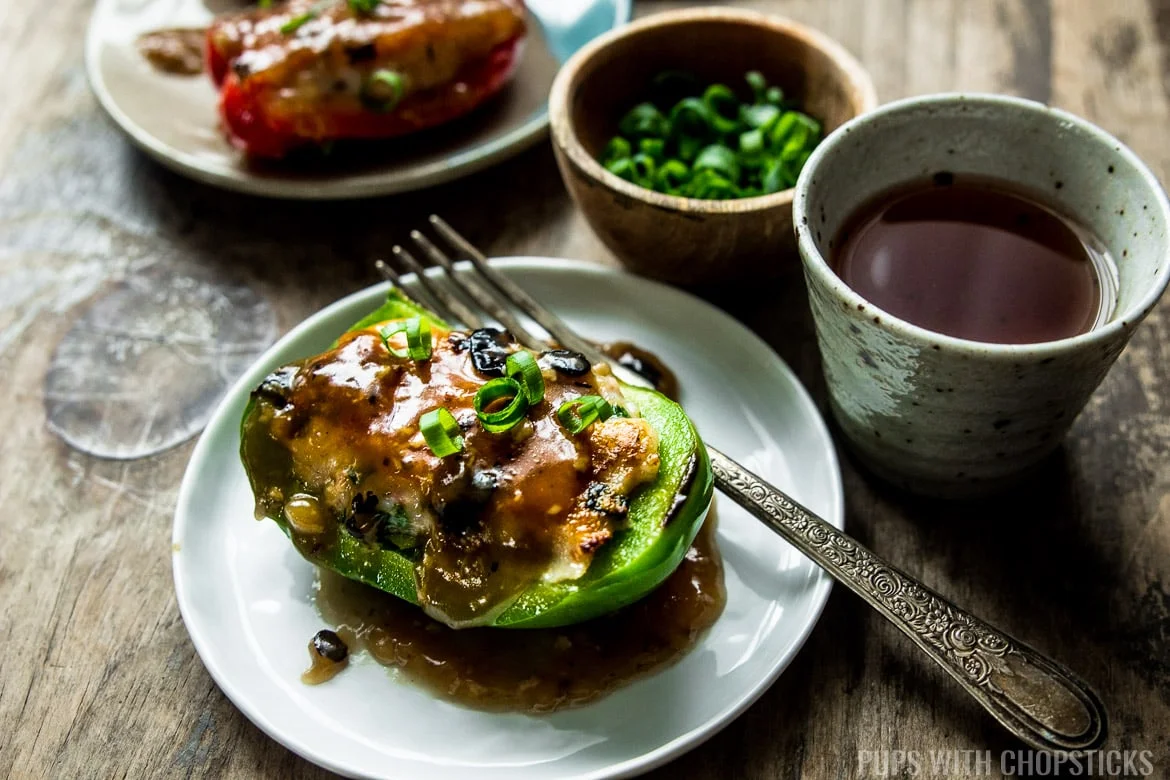
Chinese Stuffed Peppers (Dim Sum Style - 2 ways!)
Nutrition per Serving
465
Calories
30g
Protein
12g
Carbs
32g
Fat
Dim sum style, Chinese stuffed peppers recipe made with two different types of stuffing (traditional shrimp or pork) and smothered in a garlic black bean sauce.
📝 Ingredients
- 2 medium sized peppers ((any colour or type of pepper works!))
- 1 tablespoon fermented black beans ((optional, if you omit - substitute it with soy sauce))
- 2 cloves garlic ((approximately 1 tablespoon))
- 2 tablespoons oil
- 1 1/2 tablepsoons oyster sauce
- 1 tablespoon soy sauce
- 1/4 teaspoon sugar ((or honey))
- 1 tablespoon Shaoxing cooking wine
- 1 1/2 cup water ((or broth))
- 1 1/2 tablespoon corn starch
- 2 tablespoons cold water
- 300 g shrimp
- 1/2 teaspoon sesame oil
- 1 teaspoon soy sauce
- 1/4 teaspoon white pepper ((see notes about substitution))
- 1 stalk green onion ((finely chopped))
- 1 tablespoon corn starch
- 1 tablespoon oil
- 300 g ground pork ((medium or fatty. Preferably not lean))
- 1 tablespoon corn starch
- 1/2 tablespoon ginger ((grated))
- 1 teaspoon soy sauce
- 1 1/2 tablespoon oyster sauce
- 1 tablespoon oil
- green onions ((finely chopped))
👨🍳 Instructions
- 1--- MAKING GARLIC BLACK BEAN SAUCE ---
- 2Gently rinse the fermented black beans under cold water for a few seconds to reconstitute it and to remove some of the salt. Once the beans are a little soft, use the side of a knife or a fork to smash them flat and set them aside
- 3Finely chop the garlic and set it aside
- 4Mix the corn starch and cold water for the corn starch slurry (thickener) in a small bowl and set it aside
- 5In a small pot, add 2 tablespoons of oil and set the stove to medium heat.
- 6Once the oil is hot and shimmering, addin the garlic and black beans and cook them for about 1 minute until the garlic is soft.
- 7Add the rest of the ingredients for the ‘Garlic Black Bean Sauce’ into the pot (soy sauce, oyster sauce, cooking wine, water/stock, sugar) and mix it together. Let it cook until the sauce starts simmering
- 8Once the sauce starts bubbling, re-mix the corn starch slurry in the bowl (the starch might have settled to the bottom) and slowly pour it into the sauce while stirring. Keep stirring until the sauce thickens.
- 9Once the sauce thickens, the sauce is done! Set it aside with the lid on. Don't worry if a skin forms on top of the sauce once it cools - it happens.
- 10--- (OPTION 1) MAKING SHRIMP FILLING ---
- 11Defrost the shrimp by running it under cold water for 10-15 minutes and peel the shrimp.
- 12Once the shrimp has been peeled, use a knife to finely chop it. As I chop the shrimp, it will start to spread out on the chopping board so I like to fold the shrimp back into a pile and continue to chop it. I do this about 10-12 times until the shrimp because a chunky paste. Alternatively, you can also use a food processor which will give you a smoother shrimp paste.
- 13Once the shrimp has been chopped, put it in a bowl and mix the rest of the ingredients from the 'Shrimp Filling' list together and set aside.
- 14Take 1/2 teaspoon of filling and either microwaving it for 25-30 seconds or using a pan to cook it then taste it for flavour to make sure it is salty and flavourful. Adjust to taste.
- 15Once everything tastes good to you, set it aside for later
- 16(OPTION 2) MAKING PORK FILLING
- 17Place the pork in a large bowl
- 18Grate the garlic and place it in the bowl with the pork
- 19Add the remaining ingredients from the 'Pork Filling' ingredient list and mix it together.
- 20Mix the pork filling in one direction for 7-10 minutes. The salt combined with the overmixing will give you a springy pork texture instead of a crumbly pork texture.
- 21Take 1/2 teaspoon of filling and either microwaving it for 25-30 seconds or using a pan to cook it then taste it for flavour to make sure it is salty and flavourful. Adjust to taste.
- 22Once everything tastes good to you, set it aside for later
- 23--- PREPARING AND STUFFING THE PEPPERS ---
- 24Turn the pepper upside down so that the bottom is facing up. You should see 4 bumps. Imagine a line in the shape of a ‘+’ between the bumps. Cut the pepper into quarters using the space between the bumps as a guideline. (see photo in blog for an example)
- 25Once you have the 4 wedges from the pepper, remove the core, seeds, and veins. Cut the top and bottom tips off the pepper so that it can lay flat against the frying pan.
- 26Repeat this for the rest of the peppers.
- 27Once all the peppers have been prepared, place a bit of corn starch in a small bowl and rub it on the inside of the peppers
- 28Use the filling you made and stuff each pepper wedge. Try not to over stuff it, the deeper the pockets and the thicker the filling, the harder it will be to cook the filling all the way through. I like to stuff it no more than 1 inch thick and have the filling slightly above the pepper by 1-2mm
- 29--- PAN FRYING THE STUFFED PEPPERS ---
- 30Once you are ready to cook them, set a frying pan to medium low heat with a bit of oil. The filling and peppers burn easily on higher heat so we want to cook it on a slightly lower temperature for a longer time so the fillings will cook all the way through.
- 31Place the pepper in the frying pan, filling side down and cook it for approximately 3 minutes or until the filling has browned. Once the filling is brown, flip it onto the pepper side.
- 32Once all the peppers have been flipped, add about 3 tablespoons of water into the frying pan and cover it with a lid. We want to steam it a little to make sure the middle is cooked all the way through. If you are using thinner peppers with less fillling, you can skip the steaming step. Steam it until the water evaporates, which is approximately 3-4 minutes
- 33Remove the lid and continue to let the pepper cook, on the pepper side so that starts to brown. Approximately another 3 minutes
- 34Once all the peppers are ready, warm up the sauce over the stove again and then spoon some of the sauce on top and enjoy!
About the Chef & Original Recipe
This recipe was published by pupswithchopsticks.com. Visit the original source for step-by-step photos, chef notes and additional details.
Source: pupswithchopsticks.com