
Twaróg: Polish Farmer's Cheese
Nutrition per Serving
111
Calories
7g
Protein
10g
Carbs
5g
Fat
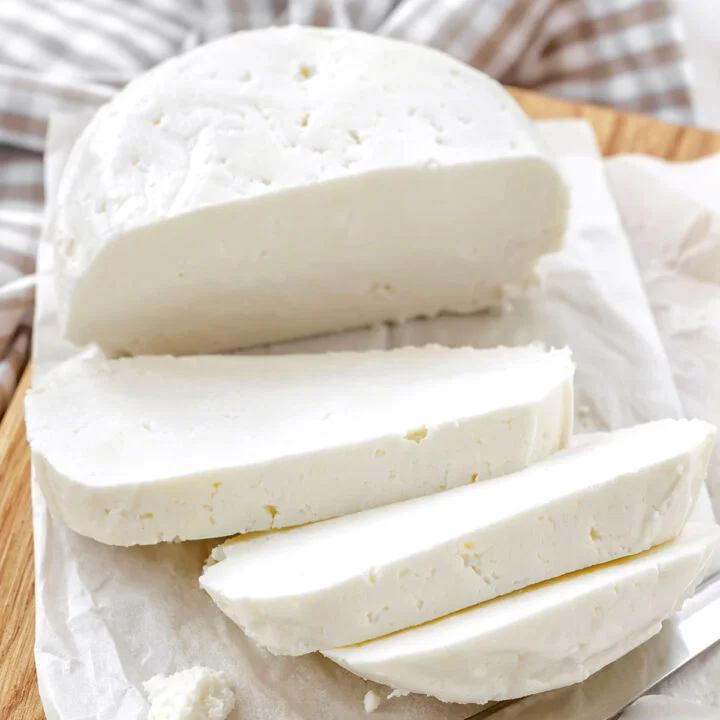
Twaróg is soft and milky, with a mild taste. This recipe makes approx. 1 pound (450 g) of Farmer’s Cheese. If you’re planning on making Sernik (Polish-style cheesecake), double the ingredients.
📝 Ingredients
- 2 qt (2 litres / 8 cups / roughly 0.5 gallon) whole milk, pasteurized - or raw milk (see notes)
- 8 tsp sour cream, natural, cultured
👨🍳 Instructions
- 1Gently warm up the milk on the stove....: Gently warm up the milk on the stove. By “gently”, I really mean it! Aim for a slightly warm (not hot!) temperature.
- 2If you’re using raw milk, sometimes a layer...: If you’re using raw milk, sometimes a layer of thick cream forms on top - keep it or remove it (I love full-fat everything, so personally I keep it; but if you’re avoiding fats - get rid of it). When using raw milk, no sour cream is needed. Just proceed to Step 5.
- 3When using pasteurized milk from a store, add...: When using pasteurized milk from a store, add 8 heaped teaspoons of sour cream (or more!) per 2 quarts (roughly 2 litres) of milk.There is no need to measure the ingredients exactly, it will work either way.
- 4Blend milk and sour cream together with a...: Blend milk and sour cream together with a fork.
- 5Pour the milk mixture into a large container,...: Pour the milk mixture into a large container, ideally a large cooking pot - that way we won’t have to transfer that milk later on.
- 6Cover the container (that’s optional). Some homecooks leave...: Cover the container (that’s optional). Some homecooks leave the container uncovered, others cover it with a cheesecloth to keep the insects away. I use a piece of a muslin square and secure it in place with a rubber band.
- 7Leave the milk in a warm place, for...: Leave the milk in a warm place, for example: on the kitchen counter. Don’t stir it, don’t poke it - just let it be.
- 8The fermentation process can take anywhere from a...: The fermentation process can take anywhere from a few hours, up to 2 days. That depends on the temperature: if you live in a hot climate, it’s likely to be ready within a day. For me, it took a day and a half to curdle.
- 9Observe the milk, have a taste from time...: Observe the milk, have a taste from time to time. Once it has curdled, the consistency turns jelly-like and the flavour becomes pleasantly sour - it’s ready. The longer you wait, the more sour the milk (and therefore eventually: the cheese as well) becomes.
- 10Carefully move the curdled soured milk into a...: Carefully move the curdled soured milk into a cooking pot, try not to break the curd too much. If you soured the milk in a cooking pot from the get-go - just keep it there.
- 11Submerging the knife into the curd, cut it...: Submerging the knife into the curd, cut it into large cubes, roughly 2 inch in size.
- 12Start heating the mixture on a ‘low’ heat....: Start heating the mixture on a ‘low’ heat. Slowly, gently. If you have a thermometer, aim for the 97-102°F (36-39°C) range in the centre of the pot.
- 13While heating, gently stir the ingredients from time...: While heating, gently stir the ingredients from time to time. Start from the edge and then move to the center of the pot. Aim to keep the same temperature for 30 minutes, up to an hour.
- 14After that time, let the mixture cool completely...: After that time, let the mixture cool completely (2-3 hours are usually enough)
- 15Place a strainer over a large bowl, to...: Place a strainer over a large bowl, to collect the strained whey. Layer it with a cheesecloth (I'm just using clean muslin squares). Pour the curled mixture in.
- 16Squeeze off the excess whey. Make a knot...: Squeeze off the excess whey. Make a knot and hang to drain for 30-40 minutes.
- 17After draining, you can make it even dryer...: After draining, you can make it even dryer by pressing it. Just put something heavy (e.g. a jar filled with water) on top of the cheese wrapped in a cloth. The resulting Twaróg will be firmer and more compact.
- 18Refrigerate until you're ready to use it.
About the Chef & Original Recipe
This recipe was published by Kasia on polonist.com. Visit the original source for step-by-step photos, chef notes and additional details.
Source: polonist.com