
Traditional Russian Pirozhki (Hand pies) - Complete Guide + Video
Nutrition per Serving
250
Calories
14g
Protein
32g
Carbs
8g
Fat
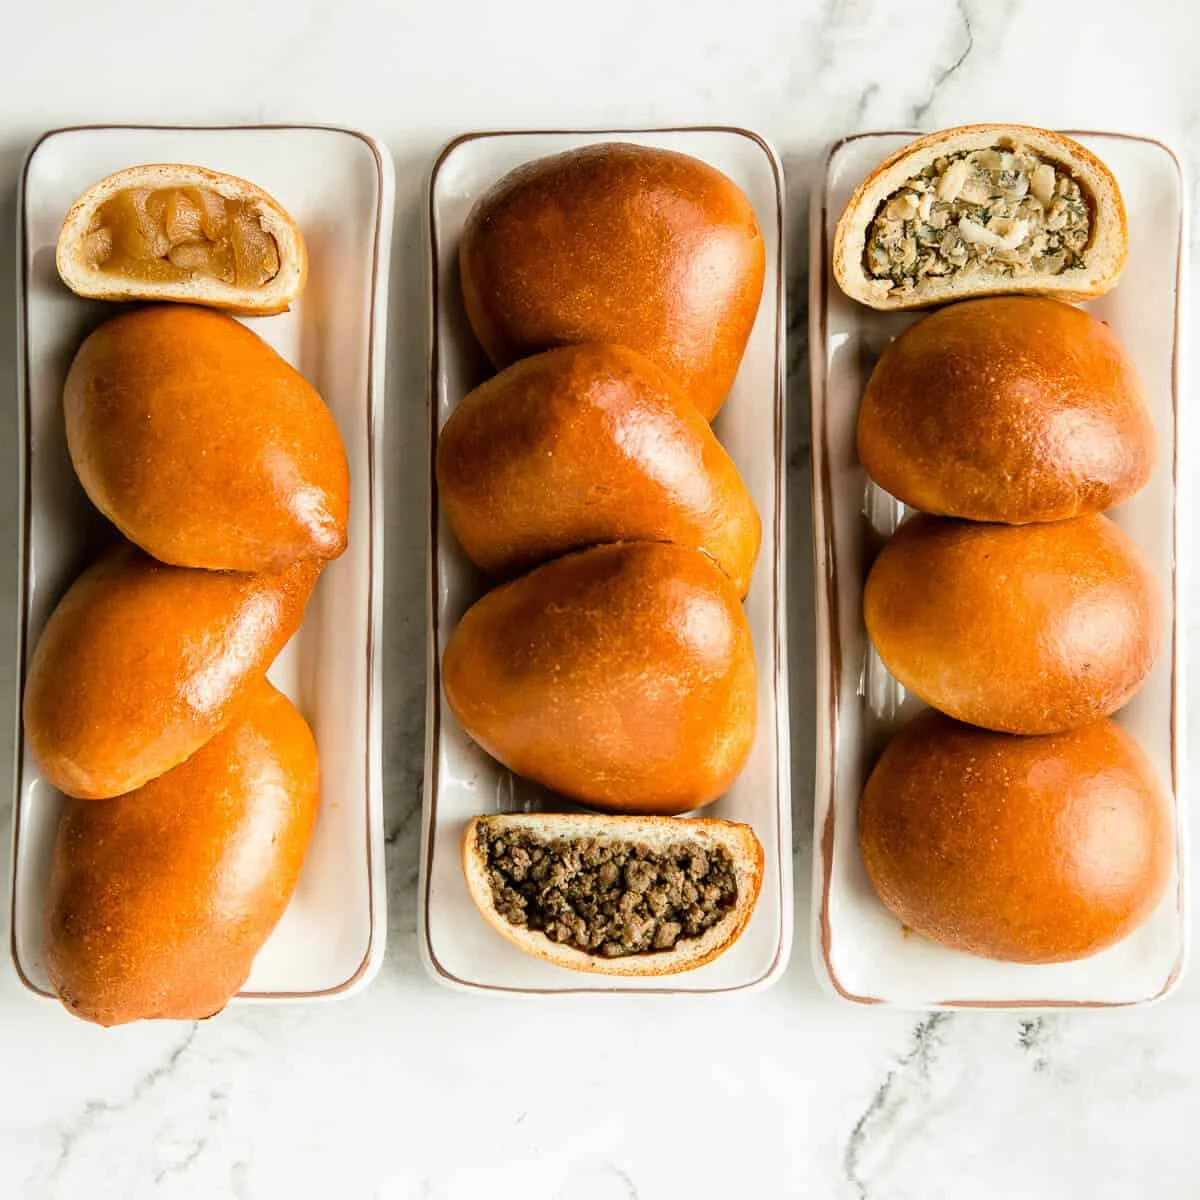
Pirozhki or пирожки are traditional Russian hand held pies with a variety of savoury or sweet fillings encased in a yeasted dough.
📝 Ingredients
- 580 grams flour (all purpose or white bread)
- 250 grams milk
- 2 each eggs (large)
- 8 grams dry active yeast (note 1)
- 85 grams sugar
- 8 grams salt
- 70 grams butter
- 900 grams beef chuck (note 2)
- 300 grams turkey hearts (note 3)
- 300 grams turkey liver (note 3)
- 250 grams onion
- 10 grams garlic
- 300 grams beef or chicken stock
- 20 grams neutral oil
- salt and pepper to taste
- 400 grams cabbage (note 4)
- 200 grams onion
- 10 grams garlic
- 5 each eggs (note 5)
- 20 grams neutral oil
- salt and pepper to taste
- 15 grams dill
- 700 grams apples (note 6)
- 150 grams sugar
- 70 grams butter
- 2 grams cinnnamon
- 1 gram cloves
- 1/2 gram star anise
👨🍳 Instructions
- 1--- Dough ---
- 2Mix the dry and wet ingredients for 10 minutes on medium speed in your kitchen aid stand mixer or whatever mixer you have. After 10 minutes, add the butter bit by bit and blend another 5 minutes until the dough is elastic and smooth.
- 3Place in a bowl covered with a damp cloth to either rise overnight in the fridge or for 2 hours at room temperature.
- 4When ready, deflate the dough and divide into 30 gram portions. Let the dough rest for 5 minutes to relax the gluten and roll into round balls. Cover and rest for another 10 minutes.
- 5When you are ready to use it, roll the balls out thinly. Ready to wrap around the filling of your choice. Make a simple egg wash by blending 1 egg with 50 millilitres of milk. We use this to spray or brush onto the pirozhki just before baking.
- 6--- Meat pirozhki ---
- 7Fry the mince meat in a hot pan until well browned. Drain any fat and keep aside.Fry the onions and garlic in the reserved fat in the same pan. Scraping the fond of the bottom of the pan. Keep the onions blond without serious caramelization.
- 8Add the fried minced meat back into the pan with the onions. Add a touch of beef stock, water or vegetables stock and slowly simmer the mix for 5 to ten minutes to soften the mince. Once done, cool the mix down before forming into 50 gram portions.
- 9Traditionally, meat pirozhki is made in a triangle shape. Make sure to pack the mix tightly, before moving into the freezer to fully set for 20 minutes. It's best to keep the mix cold at all times. If the fat melts, the shapes will fall apart and crumble. Do not try and make the mix too wet as it will result in soggy, and not fluffy pies.
- 10Once the dough his rolled out thinly, place the filling into the centre and close the pirozhki by pinching and pulling from the edges of the dough. Avoid bunching up the dough when you seal it. It should be evenly spread all over.
- 11Once the pies are shaped, move them onto a parchment lined baking tray and close with another tray turned upside down. Proof for one and a half hours in a warm place(around 30° C or 86° F) until jiggle and fully proven. Turn your oven to 170° C or 338° F.
- 12Spray or very gently brush them with egg wash, taking care not to deflate them, as they are very fragile at this stage.Bake for 18 to 20 minutes, or until deep golden brown. Cool down slightly on a wire rack before serving or storing for later.
- 13--- Cabbage Pirozhki ---
- 14Slice the cabbage as thinly as possible and into short strands to avoid long stringy bits of cabbage. Chop the onion and garlic finely before pan frying it all together until slightly caramelized and soft. If it browns too quickly or goes dry, add a touch of water and lower the temperature.
- 15Boil the eggs for 10 minutes. Cool down in cold water, then peel and grated on a box grater.
- 16Chop the dill and add all the ingredients together in a bowl before seasoning with salt and pepper. Chill down the mix completely in the fridge.
- 17Shape the filling into 50 gram balls and firm it up by placing into the freezer for 10 minutes. Roll out the dough thinly.
- 18Once rolled, place the filling into the centre of the dough and close the pirozhki by pinching and pulling from the edges of the dough. Avoid bunching up the dough when you seal it, but make sure it's completely sealed. The dough should be evenly spread all over.
- 19Place the shaped pies onto a parchment lined baking tray and close with another tray turned upside down. Proof for one and a half hours in a warm place(around 30° C or 86° F) until jiggle and fully proven. Turn your oven to 170° C or 338° F. Spray or very gently brush them with egg wash, taking care not to deflate them, as they are very fragile at this stage.
- 20Bake for 18 to 20 minutes, or until deep golden brown. Cool down slightly on a wire rack before serving or storing for later.
- 21--- Apple pirozhki ---
- 22Peel and core the apple. Cut it into roughly 1.5 centimetre or 1/2 inch pieces. Add to the pan with the sugar, butter and spices.
- 23Add to the pan with the sugar, butter and spices. Cook on medium high heat until the apples are soft to the touch but not falling apart. Remove and discard the spices.
- 24Drain the liquid and place back into the pan to reduce into a thick caramel. Place the apples back into the caramel and season with lemon zest and lemon juice before placing into a bowl and chilling down in the fridge.
- 25Once the rolled out thinly, place the filling into the centre of the dough and close the pirozhki by pinching and pulling from the edges. Avoid bunching up the dough when you seal it. It should be evenly shaped all over.
- 26Move the shaped pirozhki onto a parchment lined baking tray and close with another tray turned upside down. Proof for one and a half hours in a warm place(around 30° C or 86° F) until jiggle and fully proven. Turn your oven to 170° C or 338° F.
- 27Spray or very gently brush them with egg wash, taking care not to deflate them, as they are very fragile at this stage.Bake for 18 to 20 minutes, or until deep golden brown. Cool down slightly on a wire rack before serving or storing for later.
About the Chef & Original Recipe
This recipe was published by pantsdownapronson.com. Visit the original source for step-by-step photos, chef notes and additional details.
Source: pantsdownapronson.com