
Strawberry Shortcake Macarons (Strawberry Macarons with Cream Cheese German Buttercream and Streusel)
Nutrition per Serving
—
Calories
—
Protein
—
Carbs
—
Fat
Strawberry Shortcake Macarons (Strawberry Macarons with Cream Cheese German Buttercream and Streusel)
📝 Ingredients
- 170 g ground almonds
- 300 g powdered sugar
- 180 g egg whites, at room temperature
- 160 g sugar
- 1 tsp vanilla bean paste
- Gel Food Colouring, optional (We used ‘soft pink’ by americolor)
- 220 g all-purpose flour
- 2 Tbsp sugar
- 3/4 tsp salt
- 115 g unsalted butter, browned
- 1 Tbsp + 1 tsp water
- 400 g trimmed and quartered strawberries
- 120 g water
- 125 g sugar
- Juice of half a lemon
- 3 Tbsp corn starch
- 110 g sugar
- 12 g corn starch
- 1 egg
- 1 egg yolk
- 1/2 tsp salt
- 2 tsp vanilla bean paste
- 190 g whole milk
- 340 g unsalted butter, at room temperature
- 225 g cream cheese, at room temperature
👨🍳 Instructions
- 1--- MACARON SHELLS ---
- 2Preheat oven to 300°f / 150°c, and position the oven rack in the centre of the oven. Using a round cookie cutter or the base of a large piping tip (something about 1.5 inches in diameter), draw a "template" for your macarons on a piece of parchment paper, leaving about ¾" between each circle.
- 3Combine the almond meal and powdered sugar together in a large bowl. Sift the mixture twice, to ensure there are no large lumps and that the mixture is properly aerated. Set aside.
- 4In the bowl of a stand mixer fitted with the whisk attachment, whip the egg whites on medium speed until foamy. Gradually add the sugar, increase the mixer speed, and whip on high until the meringue starts to firm up. Add pink gel food colour a few drops at a time, until the desired colour is reached. Add vanilla and mix until incorporated. Continue to whip until the meringue forms stiff peaks (there is a good example here).
- 5Remove the bowl from the mixer. Add half of the ground almond and powdered sugar mixture, and fold into the meringue. You want to deflate the meringue just a little at this stage, to combine the meringue and ground almond mixture.
- 6Add the remaining ground almond mixture, and stir lightly to combine. Now comes the important part - mixing the batter to the correct consistency. Again, this video does a good job of explaining it. Fold the mixture in a series of 'turns', deflating the batter by spreading it against the side of the bowl. Turn the bowl slightly and repeat the movement - scooping the batter from the bottom of the bowl, and spreading it against the side. Continuously check the consistency of the batter - you want it to flow like lava when you lift the spatula from the bowl, and you should be able to 'draw' a figure 8 with it, without the batter breaking (again, watch lots of videos to get an idea! They help so much). This step can take some practice until you know what it should feel and look like. If in doubt you are better to under mix them than over mix them - the process of putting the batter into the bag and piping out will help mix a little too.
- 7Fit a large pastry bag with a medium sized round tip, such as an ateco #805. Place the macaron template on a sheet pan, and place a second piece of parchment over it. Holding the piping bag at a 90˚ angle to the surface, pipe out the batter into blobs the size of the circles drawn on the template. Finish off each piped circle with a little "flick" of your wrist to minimise the batter forming a point (it will still form a small one, but we can get rid of this with banging). Remove the template from under the macarons.
- 8Hold the baking sheet in two hands, and carefully but firmly, evenly bang it against the bench. Repeat this a few more times - this will get rid of any air bubbles, remove points on the top, and help them to spread out slightly. Sprinkle with sprinkles, if using.
- 9Repeat the piping and banging process until you have used up all of the batter - I usually make three sheet pans worth.
- 10Allow the macarons to dry at room temperature for approximately 30 minutes, or until they form a skin that you can touch without your finger sticking to them. This time will drastically vary depending on the humidity.
- 11About fifteen minutes before you are going to bake the macarons, place a spare sheet pan in the oven to preheat - this is going to be used to place under the pan with the macarons on it, to double up, which should help with even baking. Bake the macarons one sheet at a time - place the sheet with the macarons on the preheated sheet, and place in the oven.
- 12Bake for approximately 18 minutes, rotating the pan once during the cooking process, and checking for doneness after 15 minutes. The macarons should develop a foot (the ruffled part on the bottom of the macaron), and bake without browning. To see if they are done - press down lightly on a shell. If the foot gives way, it needs a little longer, if it is stable, then it is close to being done. Test a macaron shell - if you can peel it away cleanly from the paper, they are done. If they are stable but cannot yet peel away cleanly, give them another minute or so. Again, this part takes a little trial and error depending on your oven. If they seem done but do not peel away cleanly, do not worry - there is a little trick for that!
- 13Remove from the oven, and allow to cool on the sheet pan for 10 minutes before peeling off the parchment paper and allowing to cool completely on a wire rack. Repeat the baking with the remaining trays, using the same spare sheet pan to double up.
- 14If your macs do not peel away cleanly, place them, on the parchment paper, into the freezer for 5-10 minutes, then peel away from the paper.
- 15Store cooled macarons in an airtight container until ready to use.
- 16--- PIE CRUMB ---
- 17Preheat the oven to 350°f / 180°c. Line a baking tray with silpat or parchment paper.
- 18In the bowl of a stand mixer fitted with the paddle attachment, combine the flour, sugar and salt until well mixed. Add the butter and water and mix on low until clustered.
- 19Spread the mixture on the tray, and bake for 25 minutes, until golden brown. Break up into smaller clumps during the baking process. Remove from the oven and allow to cool (it will firm up a lot during cooling). Store in an airtight container until ready to use
- 20--- STRAWBERRY FILLING ---
- 21Place all ingredients into a medium saucepan. Heat over medium heat, mashing with a potato masher as the mixture begins to warm.
- 22Switch to a rubber spatula and cook the mixture, stirring frequently, until it has thickened. Transfer to a container and allow to cool completely.
- 23--- CREAM CHEESE GERMAN BUTTERCREAM ---
- 24In a bowl, whisk together the sugar and corn starch, then add the egg, egg yolk and salt, and whisk together well. In a medium non-stick saucepan, heat the milk and vanilla bean paste to just shy of a simmer. Remove from the heat.
- 25Using one hand to whisk constantly, pour half of the hot milk mixture into the egg mixture. This helps to temper the eggs and stop them from scrambling. Whisk until incorporated, and then pour the whole lot back into the saucepan.
- 26Heat the milk and egg mixture over medium heat, whisking constantly, until it begins to bubble. It will thicken quickly. Once it has thickened, cook for one minute, then remove from the heat. Pour into a shallow dish or bowl of a stand mixer and press some plastic wrap over the surface to avoid a skin from forming. Refrigerate until cold. If you are in a hurry, you can speed up this process by placing the custard mixture into a bowl, and placing the bowl into an ice bath, stirring frequently.
- 27Fit your mixer with the whisk attachment. Whip the custard mixture on medium until creamy and lump-free. Begin adding the butter, a few cubes at a time, until fully incorporated. Add in the cream cheese, and whip until smooth, then whip for a further 2-3 minutes until light and fluffy. Switch to the paddle attachment and beat on low for 3-4 minutes to help remove any big air bubbles.
- 28--- ASSEMBLY ---
- 29Place the buttercream into piping bag fitted with a tip of your choice - we used a large round tip for the macarons with the pie crumb and a large french star tip for the macs with the sprinkles.
- 30Pair up the macarons into pairs of equal sizes.
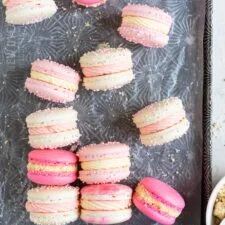
- 31Pipe a ring of buttercream on one half of the macaron, and place a blob of the strawberry filling into the centre. Top with the second shell, pressing down lightly. Add the pie crumb to the sides if desired.
- 32Chill the macarons briefly to allow the buttercream to set. Macarons taste best if you 'mature' them in the fridge overnight to let the flavours meld, but they are perfect eaten immediately too! Store leftovers in an airtight container in the fridge.
About the Chef & Original Recipe
This recipe was published by Erin Clarkson on cloudykitchen.com. Visit the original source for step-by-step photos, chef notes and additional details.
Source: cloudykitchen.com