
Soft, Spiced, and Sweet: Traditional Yeasted Jamaican Easter Bun Recipe
Nutrition per Serving
200
Calories
—
Protein
—
Carbs
20g
Fat
A Jamaican Twist on British Tradition The Jamaican Easter bun didn’t just appear out of nowhere. Like many of our iconic dishes, its roots trace back to British colonial influence—specifically, the hot cross bun traditionally eaten on Good Friday in England. But Jamaicans being Jamaicans, we made it our own.We took the concept and elevated...Read More
📝 Ingredients
- Wet Ingredients
- 2 cups malta
- 1/4 cup blended Christmas fruit
- 2 1/4 cups brown sugar
- 1 tbsp molasses
- 1 tbsp browning
- 2 tbsp vanilla essence
- 3 tbsp shortening
- 1/4 cup butter
- Fruit
- 1 cup raisins
- 1 cup halved maraschino cherries (+ more for decorating)
- Dry Ingredients
- 8 cups bread flour (spoon & leveled) + extra for dusting
- 2 packets dry active yeast (1/4 oz each)
- 2 tsps ground cinnamon
- 2 tsps grated nutmeg
- 1 tsp salt
- 1/4 tsp ground cloves
- 1/4 tsp ground allspice
- For Proofing Yeast
- 1/4 cup warm water (like bath water)
- 1 tsp brown sugar
- Glaze
- 2 tbsps honey
- 2 tbsps apricot or strawberry jam
- 3 tbsps butter
👨🍳 Instructions
- 1In a small bowl, microwave ½ cup of water for about 20 seconds. Test the temperature of the water with your fingertips. The water should feel lukewarm, like bath water. It should not be painful to touch. Add 1 tsp brown sugar and the yeast to the water. Stir to dissolve the yeast and set it aside until it bubbles and puffs up. If the yeast doesn't foam and bubble, it is dead and you will need to repeat this step.
- 2In a large bowl, combine all of the wet ingredients (except the butter and shortening) and whisk until the sugar dissolves. Add in dried fruit and set aside.
- 3In another large bowl, combine all of the dry ingredients (except the yeast which you have already activated in step 1). Gently whisk the ingredients to combine.
- 4Gently scoop the combined dry ingredients into the wet ingredient mixture. Use a spatula to lift and fold until all of the flour is combined into the liquid. Add the flour in 2 amounts. Add the foamy yeast as you combine the second amount of flour. You will be left with a wet and sticky dough.
- 5Turn the dough out on a lightly dusted surface. Dust the top of the dough with flour. Knead in the shortening and butter. Return dough to a greased bowl.
- 6Cover the bowl with cling film and place the bowl into your oven. Turn on the oven light and leave the dough to double in size for 2 hours.
- 7Oil a clean surface as well as your hands. Pour out the dough onto the oiled surface and use your hand to fold the dough over onto itself a few times. Fold inwards from the right, left, top and bottom.
- 8Use a knife or dough cutter to separate the dough into two equal halves, if making two buns. Flatten the dough and roll it into a pinwheel. Place the dough once formed, into two greased loaf pans. You may also just roll into 1 pinwheel and bake a large bun. Place the buns back into the oven with the oven light on for an additional hour until they have doubled in size. You may decorate the tops of the buns with more dried fruit of your choice before allowing them to proof a second time.
- 9Gently remove the buns from the oven and preheat the oven to 350 degrees.
- 10Bake the loaves for 50 minutes or until a toothpick inserted in the center comes out clean.
- 11Make the glaze 5 minutes before the buns are ready by melting all of the ingredients in a microwavable safe bowl and stirring with a spoon to combine.
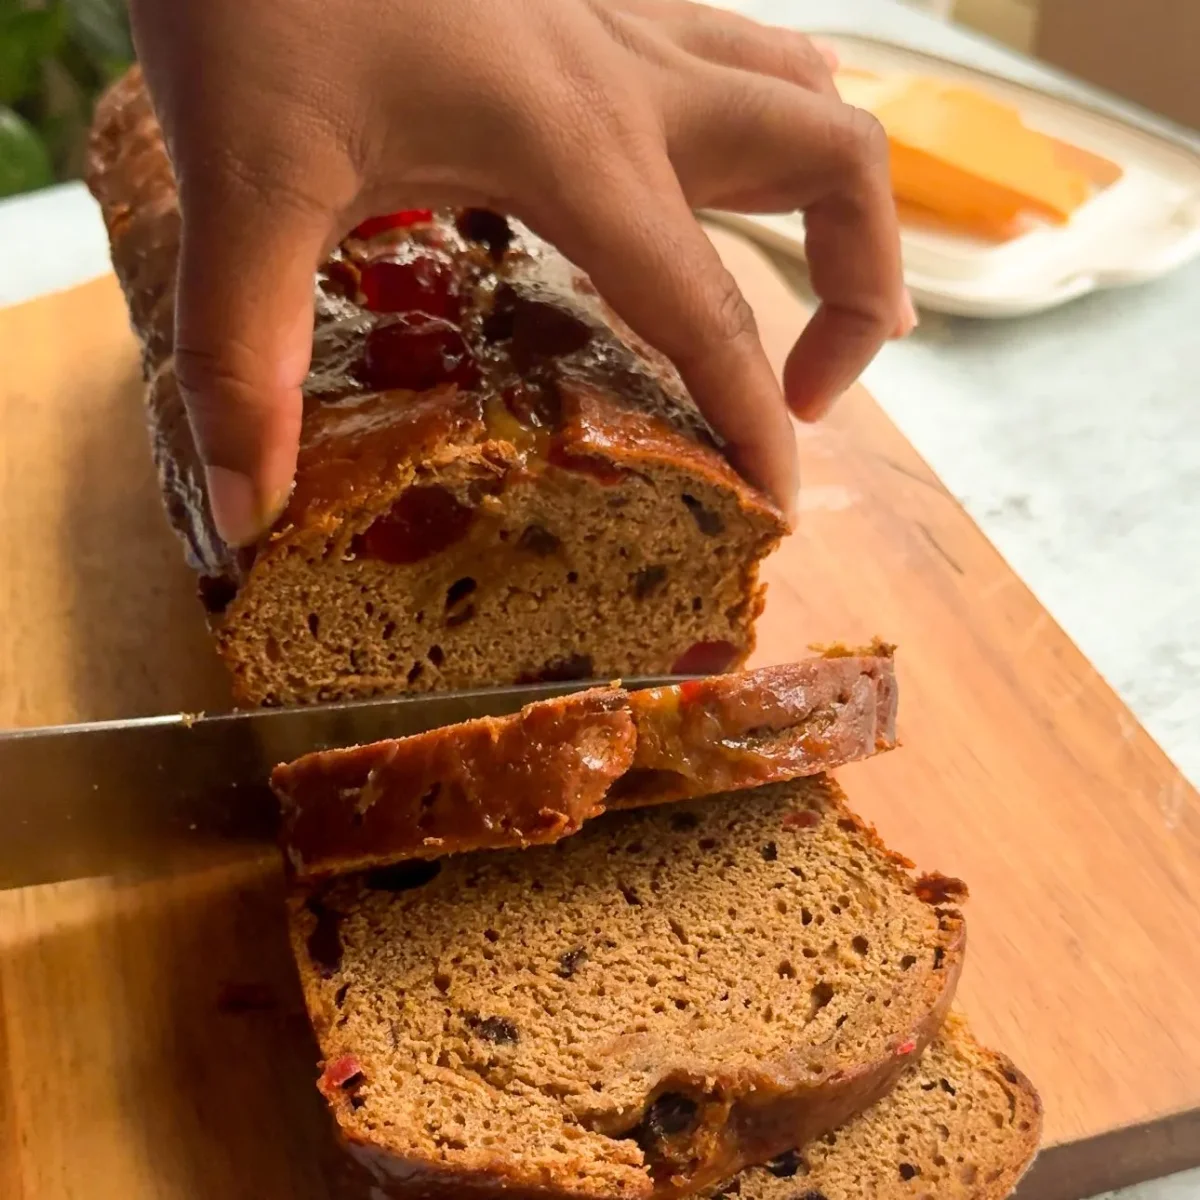
- 12Remove the buns from the oven and place on a wire rack. Glaze the buns while still hot by brushing on the glaze with a silicone brush and leave them to completely cool before cutting and serving.
- 13Be sure to serve the buns with Tastee cheese slices for the best pairing.
About the Chef & Original Recipe
This recipe was published by Jamdown Foodie on jamdownfoodie.com. Visit the original source for step-by-step photos, chef notes and additional details.
Source: jamdownfoodie.com