
Pain à la crème aigre sans produits laitiers
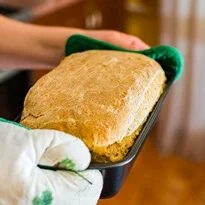
J’ai adapté cette recette de food.com. Sa texture est merveilleuse. J’utilise une partie de farine à pain pour compenser la faible teneur en gluten de la farine complète. Mais si vous préférez, vous pouvez remplacer les deux farines par 3 ½ à 3 ¾ tasses de farine tout usage. Veuillez noter que le temps de préparation ne comprend que le temps de préparation active. Prévoyez au moins 90 minutes pour la levée.
Ingrédients
- 1/4 cup warm water
- 2-1/4 teaspoons active dry yeast (1 .25-ounc packet)
- 1-1/2 tablespoons honey (use agave nectar for vegan)
- 1 1/2 cups dairy-free sour cream
- 1 teaspoon salt
- 2 cups bread flour
- 1 1/2 to 1 3/4 cups whole wheat flour
Préparation
- 1
Grease and flour a 9x5-inch baking pan.
- 2
Place the warm water in a large mixing bowl and sprinkle with the yeast.
- 3
Add the sweetener, sour cream, and salt, and mix until well combined.
- 4
Add the bread flour and mix until all of the flour is mixed in.
- 5
Gradually add the whole wheat flour. The dough will become quite thick so you will need to work it with your hands. Start with the 1-1/2 cups and add up to another ¼ cup if the dough is too sticky. It should be a just a touch sticky, but smooth, pliable, and easy to knead with your hands.
- 6
Place the dough in a greased or floured bowl (I just use the mixing bowl), cover loosely with plastic wrap or a damp towel, and place it in a warm place to rise for 1 hour, or until doubled in size. In the cooler months, I put it in a just warm oven to rise (turn the oven onto 150ºF, then turn it off, letting some of the heat out when I open it).
- 7
Punch the dough down, knead it briefly, then shape it into a loaf that will fit into your bread pan.
- 8
Return the dough to that warm place to rise for another 30 minutes.
- 9
Preheat your oven to 350ºF.
- 10
Bake the bread for 30 to 35 minutes, or until the crust begins to brown slightly, and it sounds hollow when tapped.
- 11
Let it cool for a few minutes in the pan, then remove the loaf to a wire rack to cool completely before cutting.
Cuisinez-la avec la recette originale
Cette recette vient de godairyfree.org. Leur page propose les photos, les notes et les astuces de l’auteur : le meilleur endroit pour la cuisiner.
Voir la recette sur godairyfree.org