
Pain pita au levain, moelleux et bien gonflé
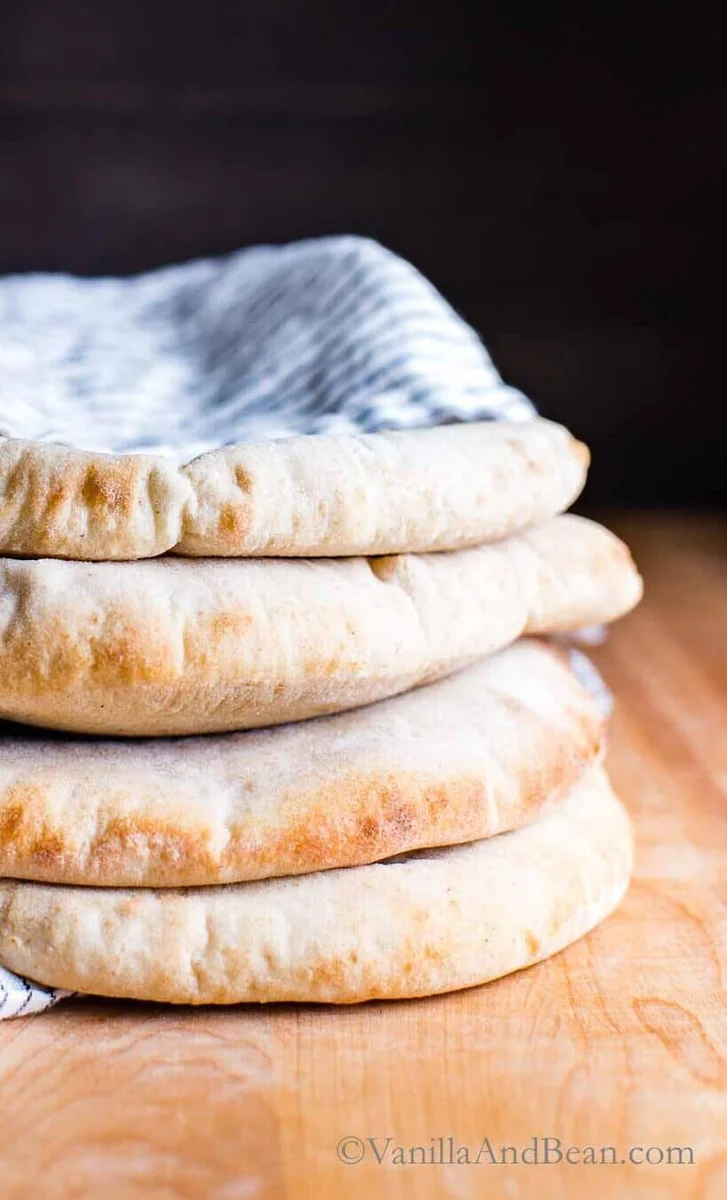
Un pain pita au levain moelleux, tendre et bien gonflé, parfait pour garnir des sandwichs ou pour accompagner des sauces et tartinades savoureuses, comme mon houmous aux artichauts ; vous pouvez aussi préparer des sandwichs pita grecs ! Utilisez votre levain, qui doit avoir doublé de volume, pour réaliser cette recette de pita au levain. Le temps de fermentation en masse indiqué ci-dessus varie selon la température ambiante et l’activité de votre levain. Pour un résultat optimal, pesez les ingrédients. << Consultez l’article du blog pour trouver des recettes à déguster avec vos pitas >> Exemple de planning : le matin, nourrissez votre levain et laissez-le doubler de volume. Le soir, mélangez la pâte et laissez-la fermenter en masse à température ambiante. Le lendemain matin, façonnez, laissez lever et faites cuire.
Ingrédients
- 1 cup (200 grams) Sourdough Starter (100% hydration, active and doubled in size)
- 3/4 cup + 2 tablespoons (200 grams) Warm Water (80 degrees Fahrenheit (27 Celsius))
- 2 tablespoons Maple Syrup (or honey)
- 2 tablespoons Extra Virgin Olive Oil
- 2 cups (300 grams) Bread Flour (unbleached)
- 1/2 cup (85 grams) Whole Wheat Flour (stone ground)
- 1 teaspoon (6 grams) Fine Sea Salt
Préparation
- 1
Mix the Dough: In a large mixing bowl, add the sourdough starter, water, maple syrup, and olive oil. Whisk until there are no chunks of starter floating around. To the wet ingredients, add the bread flour, whole wheat flour and salt.
- 2
First, mix with a fork, the dough will become shaggy. Then mix by hand, mixing, folding and pushing the dough until the flour is fully incorporated and no dry bits are present. It will seem dry at first, but the more you work the dough, the more hydrated it will become. Do this for about 3-4 minutes. The dough will stick to your fingers as you go.
- 3
Use the fork to scrape off the dough on your fingers as much as you can. Cover bowl with a damp tea towel. Set a timer for for 30 minutes and allow the dough to rest for 30 minutes. Now is a good time to feed/refresh your starter.
- 4
Fold the Dough: After the dough has rested, fold the dough. To do this, grab a portion of the dough while it remains in the bowl, stretch it up and fold it over, pressing your fingertips into the center of the dough. You'll notice the dough is less stiff and more workable at this point. Repeat, until you've worked your way around the dough. This is the first fold, and you can stop here and begin bulk fermentation, but If time permits, and optimally, you'll want to repeat this fold at least one more time, two if you can, as it improves the final dough's structure. Allow for about 30-45 minutes each between folds.
- 5
Bulk (fermentation) Rise: After the last fold, cover the bowl with two damp towels and allow to rise overnight at room temperature. This will take about 10-12 hours at 70 degrees Fahrenheit (21 Celsius), but in a cooler kitchen the dough can take up to 12-16 hours to rise - this is the norm in my chilly kitchen. The dough is ready when it no longer looks dense, is jiggly when the bowl is shaken, and has about doubled in size.
- 6
Shape the Dough: In the morning, and with damp fingertips, coax the dough into a floured work-surface. Divide the dough into 4 pieces (210 grams each). Working quickly, with a piece of dough on the work surface, pull the edges of each piece to the center to shape the dough, and pinch making a rough dough ball. Place the dough ball on the floured work surface pinched side down. Rest the dough for five minutes. Scrape the flour away from your work surface and sprits a touch of water. This will increase friction between the dough and surface if needed (otherwise the dough will slide around rather than grip the surface to form a tight ball). Gently cup your hand behind the dough ball and pull it towards you to increase surface tension. Once a ball is formed, proof the dough.
- 7
Proof the Dough (second rise): Transfer the balls to a lightly floured surface, and cover with a damp tea towel. Allow the dough to rise at room temperature for 15 minutes (a quick proof). They'll become just slightly puffy.Meanwhile, preheat the oven to 500 degrees Fahrenheit (260 Celsius). Arrange the oven racks in the upper and bottom third of the oven. Place an upside down sheet pan(s) and/or pizza stone on each rack for preheating.
- 8
Roll Out the Dough Balls: On a lightly floured work surface, use a rolling pin to roll the dough balls into a uniform disk to between 1/8 - 1/4 inch (.3 - .6 centimeters) thick and 7 - 7 1/2 inches (17 - 19 centimeters) wide, turning the dough like pie dough to keep a circular shape, sprinkling with more flour as needed to prevent sticking. If the dough becomes difficult to roll, set it aside to rest for about five minutes, and roll another ball. Transfer the pita dough to a small piece of parchment paper. Cover with a damp tea towel unless transferring directly to the oven. Finish rolling out the remaining dough balls.
- 9
Bake the Pita Bread: Note: You can bake two pita at a time (two is easier to manage without cooling the oven down too much). I bake two at a time on one sheet pan (preferably), one at a time on a stone. Once the oven is preheated, transfer the pita to a peel or upside down sheet pan. Open the oven door, and using the parchment as a handle, slide the pita onto the preheated pan or stone.Bake for 5 minutes and 20 seconds or until the pita is puffed up and only lightly golden on the bottom around the edges. It won't brown on top. No need to flip the pitas while they're baking.
- 10
Remove from the oven and loosely wrap the pitas in a tea towel(s). Do not deflate the pitas while still hot as the steam coming out of the pita will burn skin. Rest 10 minutes, then gently deflate once cooled.Slice the pitas in half and enjoy stuffed, or slice into wedges for dipping in all the things (see blog post for ideas!).
- 11
To Store: Sourdough is best consumed on the same day it's baked, but pita will last for 2-3 days stored at room temperature in a sealed plastic bag.Baked pita freezes beautifully. First, allow the pita to cool completely, then place in a freezer bag. Freeze for up to two weeks. Thaw at room temperature, and rewarm in a 350F oven, wrapped in foil (to keep their softness) for about 10 minutes.
Cuisinez-la avec la recette originale
Cette recette vient de vanillaandbean.com. Leur page propose les photos, les notes et les astuces de l’auteur : le meilleur endroit pour la cuisiner.
Voir la recette sur vanillaandbean.com