
Pain soda irlandais cétogène
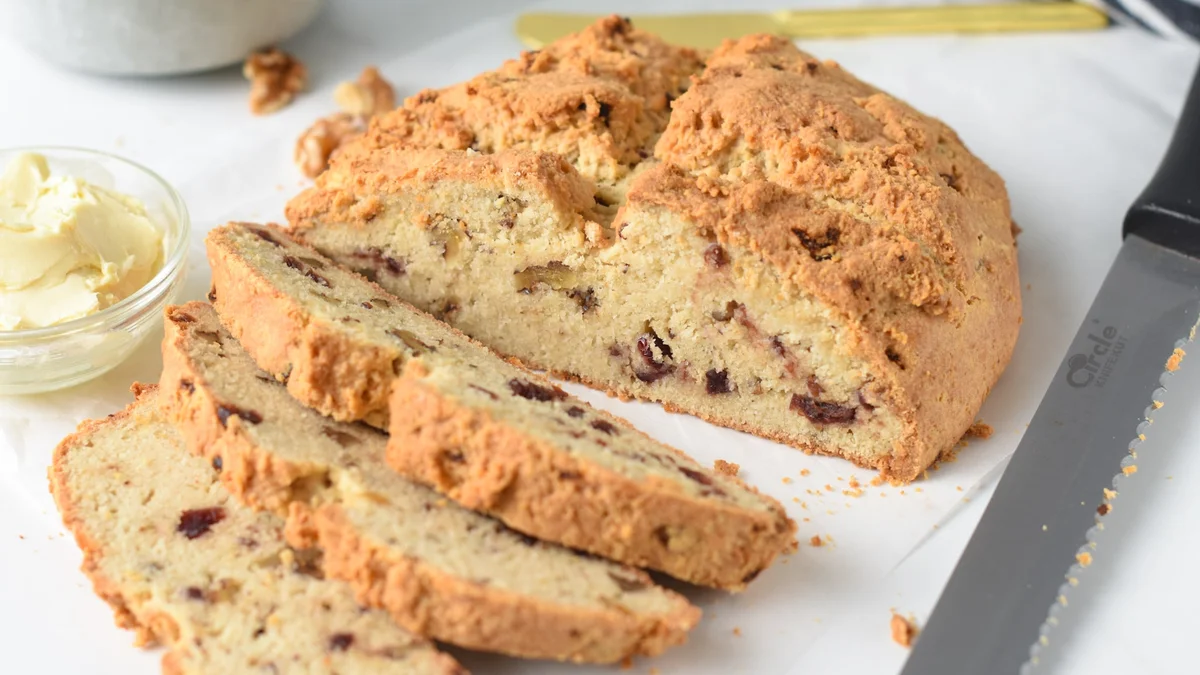
Cette recette de pain soda irlandais cétogène donne un pain à la croûte croustillante et à la mie dense, garni de noix croquantes et de canneberges sans sucre. Il a tout le goût et la texture que l’on attend d’un pain soda classique, mais ne contient que 3,2 g de glucides nets par tranche. De plus, cette recette de pain cétogène pauvre en glucides propose aussi une option sans produits laitiers.
Ingrédients
- 3 cups Almond Flour (ultra fine is the best)
- 3 tablespoons Protein Powder
- 1 teaspoon Baking Powder
- 1/2 teaspoon Baking Soda
- 3 large Egg Whites
- 2 tablespoons Melted Butter
- 1/3 cup Almond Milk
- 2 teaspoons Apple Cider Vinegar
- 1/2 teaspoon Salt
- 1/3 cup Sugar-Free Cranberries (finely chopped)
- 1/3 cup Chopped Walnuts (finely chopped)
- 2-3 tablespoons Granulated Sweetener
Préparation
- 1
Preheat oven to 350°F (180°C). Line a cast iron pan, baking sheet, or pizza pan with holes with parchment paper. Slightly oil the paper with olive oil. Set aside.
- 2
In a small mixing bowl, whisk almond milk, apple cider vinegar, and melted butter (or olive oil). Set aside for 10 minutes until it slightly curdles.
- 3
In another large mixing bowl, whisk almond flour, unflavored protein powder, baking powder, baking soda, salt, and sweetener, if used. Whisk well until no lumps of protein powder can be seen.
- 4
Pour the milk mixture and egg white onto the dry ingredients and stir with a spatula until a thick, heavy but wet batter forms. It should be dense but moist and wet.
- 5
Fold in any optional adds-on like chopped walnuts and sugar-free cranberries and stir to incorporate.
- 6
Using your spatula push down the batter on the prepared baking sheet.
- 7
Oil your hands very well with olive oil and rub the dough to shape a 6-inch-wide disc (20cm) 2-inch tall (5cm). The bread won't rise or expand in the oven so the shape you give now matters.
- 8
You don't have to smoothen the loaf by rubbing or pressing, keep it rough and bumpy for a real Irish bread aspect.
- 9
Oil a knife blade and shape a cross on top of the bread - the dough is very sticky, so it's a bit challenging, but again, it doesn't have to be perfect.
- 10
Bake for 30-40 minutes in the center rack of the oven or until golden brown and a pick inserted in the center comes out clean or with tiny little crumbs on it.
- 11
Stop the oven, open its door halfway, and let the bread cool down for 40 minutes before releasing it on a cooling rack at room temperature.
- 12
--- Serving ideas ---
- 13
Cut into slices of about (45g, 1.5oz) and top with butter, cheese, peanut butter, or plain as a side to a soup.
- 14
--- Storage ---
- 15
Store the bread wrapped in a clean kitchen towel at room temperature for up to 4 days or freeze slices for later in an airtight container or zip lock bags. Thaw the day before at room temperature.
Cuisinez-la avec la recette originale
Cette recette vient de sweetashoney.co. Leur page propose les photos, les notes et les astuces de l’auteur : le meilleur endroit pour la cuisiner.
Voir la recette sur sweetashoney.co