
Bouchées de brie en pâte feuilletée
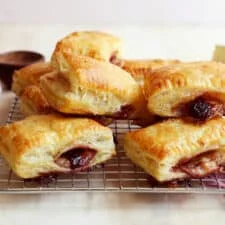
De petites bouchées de fromage salé et de confiture sucrée dans une pâte feuilletée croustillante. Un apéritif simple et parfait.
Ingrédients
- 2 sheets puff pastry, thawed but still cold
- 1/2 wedge of brie (about 4 ounces), cold
- 1/3 cup cherry jam (or any flavor you fancy!)
- 1 large egg, beaten
- splash of milk
- coarse sea salt
Préparation
- 1
All-butter, store bought puff pastry usually comes frozen and folded into thirds. We’re going to use these folded thirds to our advantage. Cut the puff pastry into thirds along the creases. Cut each panel into four pieces. They’ll be 2 1/4-inch tall and 3-inches wide. One sheet of puff pastry will yield 12 rectangles. Cut each rectangle in half. You’ll have 24 little rectangles that will create 12 little rectangle pockets.
- 2
Combine beaten egg and splash of milk. Brush 12 of the small rectangles with egg wash. If you’d like to make brie bites on sticks, now is the time! Place a popsicle stick halfway up the puff pastry and press in gently. Place a small sliver of brie (rind and all) on top of the egg wash (and stick). Top with about 1/2 teaspoon of cherry jam. Take another square of puff pastry and press between your fingers to make the rectangle slightly bigger. Place puff pastry on top of the cheese and jam. Use a fork to press the edges together. The egg wash will act as glue. Make sure to seal the edges well by crimping with the fork. Prick the top lightly with a fork.
- 3
Place a rack in the center of the oven and preheat oven to 375 degrees F. Place prepared brie bites on a parchment lined baking sheet. Brush with egg wash. Sprinkle with a touch of coarsely ground sea salt. Bake for 12 to 14 minutes or until golden brown.
- 4
Remove from the oven and allow to cool slightly before serving.
- 5
Brie bites are best served warm, but are also delicious at room temperature.
Cuisinez-la avec la recette originale
Cette recette vient de joythebaker.com. Leur page propose les photos, les notes et les astuces de l’auteur : le meilleur endroit pour la cuisiner.
Voir la recette sur joythebaker.com