
Pain facile aux graines de lin, sans gluten et sans produits laitiers
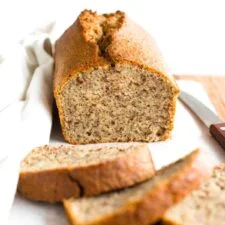
Cette recette facile de pain aux graines de lin donne un pain tendre à la mie moelleuse. Légèrement sucré et relevé d’une pointe de cannelle, ce pain rapide est parfait au petit-déjeuner ou au goûter. Il est entièrement sans gluten, sans produits laitiers et sans levure. Faites-en un pain pour savourer du pain maison quand vous en avez envie !
Ingrédients
- 2/3 cup sunflower oil
- 3/4 cup sugar
- 4 large eggs, room temperature, beaten
- 1 cup almond milk
- 1 3/4 cup gluten-free all-purpose flour
- 1/2 cup flaxseed meal
- 2 1/2 teaspoons baking powder
- pinch of salt
- 1 1/2 teaspoons ground cinnamon
Préparation
- 1
Preheat and Grease: Preheat the oven to 350F and grease an 8″ x 4″ metal loaf pan.
- 2
Beat Oil and Sugar: In a large bowl, beat the oil and sugar until combined.
- 3
Add Eggs and Milk: Add the eggs and milk and whisk to get a pale yellow liquid mixture.
- 4
Whisk Dry Ingredients: In a medium bowl, whisk the gluten-free all-purpose flour, flaxseed meal, baking powder, salt, and cinnamon to combine.
- 5
Add Dry Ingredients to Wet Ingredients: Sift the dry ingredients into the bowl with the wet ingredients and mix well to get a homogeneous batter (the batter will be rather liquid).
- 6
Transfer Batter to Pan: Pour the batter into the prepared loaf pan.
- 7
Bake Until Golden Brown: Bake for 50 to 55 minutes until the loaf is golden brown on top and a toothpick inserted in the middle comes out clean.
- 8
Cool Completely Before Slicing: Allow the loaf to cool for at least 5 minutes in the pan before removing it and then cooling it completely on a wire rack before slicing.
Cuisinez-la avec la recette originale
Cette recette vient de dishbydish.net. Leur page propose les photos, les notes et les astuces de l’auteur : le meilleur endroit pour la cuisiner.
Voir la recette sur dishbydish.net