
Pain de mie facile sans gluten et végétalien
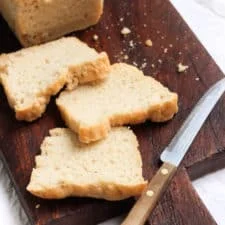
Un pain de mie moelleux et délicieux, facile à préparer et, surtout, sans gluten et végétalien ! Dégustez-le grillé avec de la confiture de graines de chia aux fruits rouges pour commencer la journée de la meilleure façon. Ou préparez des tartines à l’avocat ou des sandwichs ! Quelle que soit la façon dont vous le mangez, ce pain est toujours délicieux !
Ingrédients
- 1 3/4 cups warm water
- 2 tablespoons sugar
- 2 1/4 teaspoons active dry yeast
- 4 tablespoons vegetable oil
- 1 1/4 cups brown rice flour
- 3/4 cup sorghum flour
- 2/3 cup cornstarch
- 1/3 cup tapioca starch
- 1 teaspoon xanthan gum
- 1 1/2 teaspoons salt
Préparation
- 1
Combine the warm water, sugar and yeast in a small bowl. Mix well and let the mixture sit for 5 minutes in a warm, draft-free place until it becomes foamy. (If the yeast mixture doesn’t become foamy, it means that the yeast has probably expired. Throw the mixture away and use a new batch of yeast).
- 2
In a large mixing bowl, combine the brown rice flour, sorghum flour, corn starch, tapioca starch, xanthan gum and salt together. Mix well.
- 3
Pour the yeast mixture and vegetable oil into the bowl with the dry ingredients and stir with a wooden spoon until you get a homogeneous dough. The dough will be wet, not like normal wheat dough, but this is what you’re looking for.
- 4
Grease a 9 x 5″ loaf pan and transfer the dough to the pan, using the back of a wet spoon to smooth out the dough.
- 5
Place the pan in a warm, draft-free place (I placed my dough in the closed oven with the oven switched off) and let the dough rise over the next 1 hour (it should have doubled by then).
- 6
In the last 15 minutes of rising, remove the pan from the oven and pre-heat the oven to 375 degrees Fahrenheit (190 degrees Celsius).
- 7
Bake dough for 40 minutes until golden and the loaf sounds hollow when tapped.
- 8
Let the loaf cool in the pan for 10 minutes before transferring to a wire rack and cooling for at least 30 minutes before slicing into it.
Cuisinez-la avec la recette originale
Cette recette vient de dishbydish.net. Leur page propose les photos, les notes et les astuces de l’auteur : le meilleur endroit pour la cuisiner.
Voir la recette sur dishbydish.net