
Biscuits aux céréales et aux vermicelles, sans gluten
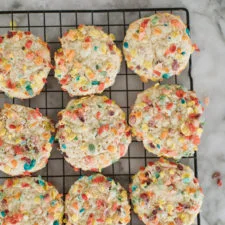
Un biscuit au sucre à la fois moelleux et croustillant, parsemé de Fruity Pebbles et enrobé de ces céréales pour un petit croquant.
Ingrédients
- 1 1/2 cups (204 grams) gluten-free baking flour (I used King Arthur Flour’s Measure for Measure blend)
- 1 teaspoon baking powder
- 1 teaspoon cream of tartar
- 1/2 teaspoon baking soda
- 1/2 teaspoon kosher salt
- 1/2 cup (1 stick, 113 grams) unsalted butter, at room temperature
- 3/4 cup (150 grams) granulated sugar
- 1 large egg
- 1 large egg yolk
- 1 teaspoon pure vanilla extract
- 1/2 cup Fruity Pebbles plus a bowlful for dipping
Préparation
- 1
Place racks in the center and upper third of the oven and preheat the oven to 350 degrees F. Line 2 baking sheets with parchment paper.
- 2
In a medium bowl whisk together flour, baking powder, cream of tartar, baking soda, and salt.
- 3
In the bowl of an electric mixer fitted with a paddle attachment, beat the butter and sugar at medium speed until light and fluffy, about 3 to 4 minutes. Add the egg, yolk, and vanilla extract, and beat until thoroughly combined.
- 4
Reduce the mixer speed to low, and slowly add the dry ingredients into the wet ingredients. The dough will be thick (you may have to finish incorporating the mixture with a spatula). Fold in 1/2 cup of the cereal.
- 5
Place 1 – 1 1/2 cups of cereal in a medium bowl. Scoop up 2 tablespoons of dough and roll into a ball. Dip the ball in the bowl of cereal to cover generously. Place dough balls on a parchment lined backing sheet.
- 6
Bake until the cookies have spread and are just beginning to brown around the edges, but are mostly pale and soft, 10-12 minutes. Let cool on the cookie sheets for 5 minutes before transferring to wire racks to cool completely. The cookies will keep in an airtight container for up to 4 days.
Cuisinez-la avec la recette originale
Cette recette vient de joythebaker.com. Leur page propose les photos, les notes et les astuces de l’auteur : le meilleur endroit pour la cuisiner.
Voir la recette sur joythebaker.com