
Vegan Coconut Cake
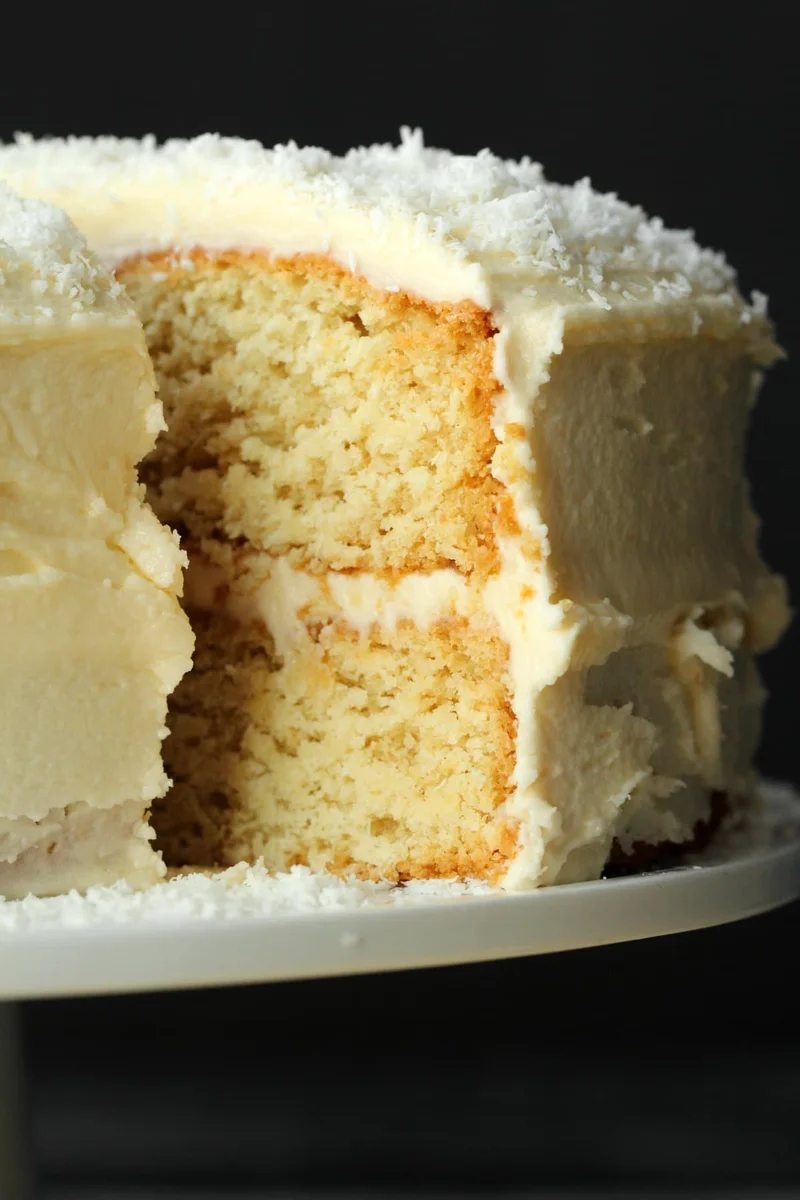
Fabulous two layered vegan coconut cake topped with a coconut rum frosting. It's moist, packed with coconut flavor and super easy to make!
Ingrédients
- 2 2/3 cups All Purpose Flour ((330g))
- 1 1/2 cups White Granulated Sugar ((300g))
- 1 1/2 tsp Baking Soda
- 3/4 tsp Salt
- 2 cups Dessicated Coconut ((160g) Finely Shredded Coconut)
- 1 1/2 cups Coconut Milk ((360ml))
- 1/2 cup Coconut Oil ((120ml) Melted)
- 1 Tbsp Distilled White Vinegar (or Apple Cider Vinegar)
- 1 tsp Vanilla Extract
- 4 1/2 cups Powdered Sugar ((540g))
- 1/2 cup Vegan Butter ((112g))
- 1/4 cup Malibu Coconut Rum ((60ml))
- 1 Tbsp Coconut Milk
- Dessicated Coconut
Préparation
- 1
Preheat the oven to 350°F (180°C).
- 2
Spray two 8 inch cake pans with non stick spray and line the bottoms with parchment paper. Set aside.
- 3
Sift the flour into a mixing bowl and then add the sugar, baking soda, salt and dessicated coconut. Mix together.
- 4
Then add in the coconut milk, melted coconut oil, vinegar, and vanilla and stir into a thick batter. Make sure it's well mixed but be careful not to overmix.
- 5
Divide the batter evenly between the two cake pans and spread it out to the edges of the pans with a spatula or the back of a spoon, the batter will be too thick to spread out on its own.
- 6
Bake for 30 minutes or until a toothpick inserted into the center of one of the cakes comes out clean.
- 7
Transfer the cakes to a cooling rack and allow to cool completely before frosting.
- 8
Prepare your frosting by adding the powdered sugar, vegan butter, coconut rum and coconut milk to a mixing bowl and mixing with an electric mixer starting off slow and then gradually increasing speed until thick and smooth. If your frosting is too thick, add a tiny bit more coconut milk, a drop at a time until you reach the right consistency, if it's too thin add more powdered sugar.
- 9
Frost your cake and decorate it with plenty of dessicated coconut.
Cuisinez-la avec la recette originale
Cette recette vient de lovingitvegan.com. Leur page propose les photos, les notes et les astuces de l’auteur : le meilleur endroit pour la cuisiner.
Voir la recette sur lovingitvegan.com