
Pain sans gluten et cétogène à la levure
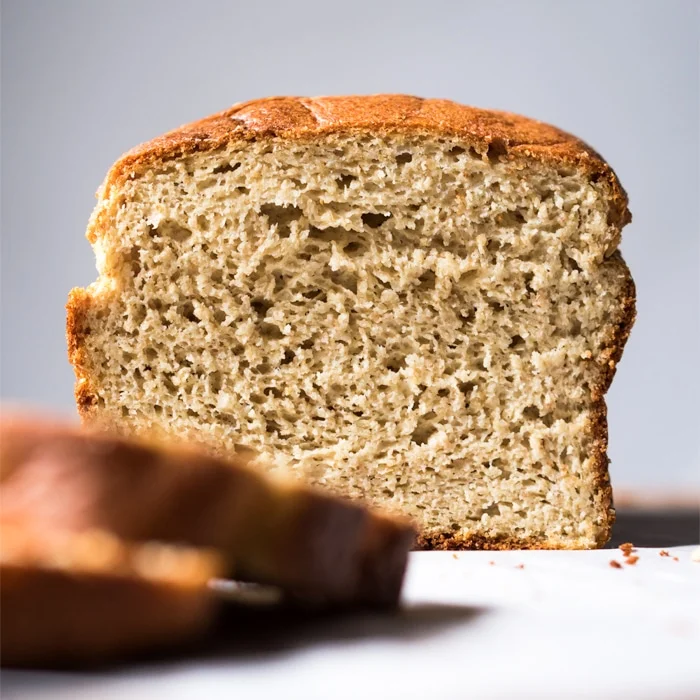
Vous pouvez compter sur ce pain sans gluten et cétogène à la levure pour être tendre, moelleux, absolument délicieux et doté d’une mie incroyable. De plus, avec deux fois moins d’œufs que dans votre recette habituelle de pain pauvre en glucides, ce pain à sandwich sans goût d’œuf deviendra sûrement un incontournable ! Ah, et si vous préférez cuisiner avec des tasses plutôt qu’en grammes, cliquez simplement sur « US Cups » pour obtenir une conversion instantanée. Même si, pour de meilleurs résultats, nous vous conseillons vivement de peser vos ingrédients.
Ingrédients
- 2 teaspoons active dry yeast
- 2 teaspoons inulin (or maple sirup, honey, to feed the yeast*)
- 120 ml water (lukewarm between 105-110°F)
- 168 g almond flour (**)
- 83 g golden flaxseed meal (finely ground)
- 15 g whey protein isolate
- 18 g psyllium husk (finely ground)
- 2 teaspoons xanthan gum (or 4 teaspoons ground flaxseed meal**)
- 2 teaspoons baking powder
- 1 teaspoon kosher salt
- 1/4 teaspoon cream of tartar
- 1/8 teaspoon ground ginger
- 1 egg (at room temperature)
- 110 g egg whites (about 3, at room temperature)
- 56 g grass-fed unsalted butter (or ghee, melted and cooled)
- 1 tablespoon apple cider vinegar
- 58 g sour cream (or coconut cream + 2 tsp apple cider vinegar)
Préparation
- 1
--- For the paleo & keto bread ---
- 2
See recipe video for guidance on keto yeast breads. And be sure to check out the post for full deets, tips and possible subs!
- 3
Line a 8.5 x 4.5 inch loaf pan with parchment paper (an absolute must!). Set aside.
- 4
Add yeast and maple syrup (to feed the yeast, see notes) to a large bowl. Heat up water to 105-110°F, and if you don't have a thermometer it should only feel lightly warm to touch. Pour water over yeast mixture, cover bowl with a kitchen towel and allow to rest for 7 minutes. The mixture should be bubbly, if it isn't start again (too cold water won't activate the yeast and too hot will kill it).
- 5
Mix your flours while the yeast is proofing. Add almond flour, flaxseed meal, whey protein powder, psyllium husk, xanthan gum, baking powder, salt, cream of tartar and ginger to a medium bowl and whisk until thoroughly mixed. Set aside.
- 6
Once your yeast is proofed, add in the egg, egg whites, lightly cooled melted butter (you don't want to scramble the eggs or kill the yeast!) and vinegar. Mix with an electric mixer for a couple minutes until light and frothy. Add the flour mixture in two batches, alternating with the sour cream, and mixing until thoroughly incorporated. You want to mix thoroughly and quickly to activate the xanthan gum, though the dough will become thick as the flours absorb the moisture.
- 7
Transfer bread dough to prepared loaf pan, using a wet spatula to even out the top. Cover with a kitchen towel and place in a warm draft-free space for 50-60 minutes until the dough has risen just past the top of the loaf pan. How long it takes depends on your altitude, temperature and humidity- so keep an eye out for it every 15 minutes or so. And keep in mind that if you use a larger loaf pan it won't rise past the top.
- 8
Preheat oven to 350°F/180°C while the dough is proofing. And if you're baking at high altitude, you'll want to bake it at 375°F/190°C.
- 9
Place the loaf pan over a baking tray and transfer gently into the oven. Bake for 45-55 minutes until deep golden, covering with a lose foil dome at minute 10-15 (just as it begins to brown). Just be sure that the foil isn't resting directly on the bread.
- 10
Allow the bread to rest in the loaf pan for 5 minutes and transfer it to a cooling rack. Allow to cool completely for best texture- this is an absolute must, as your keto loaf will continue to cook while cooling! Also keep in mind that some slight deflating is normal, don't sweat it!
- 11
Keep stored in an airtight container (or tightly wrapped in cling film) at room temperature for 4-5 days, giving it a light toast before serving. Though you'll find that this keto bread is surprisingly good even without toasting!
Cuisinez-la avec la recette originale
Cette recette vient de gnom-gnom.com. Leur page propose les photos, les notes et les astuces de l’auteur : le meilleur endroit pour la cuisiner.
Voir la recette sur gnom-gnom.com