
Peach Galette
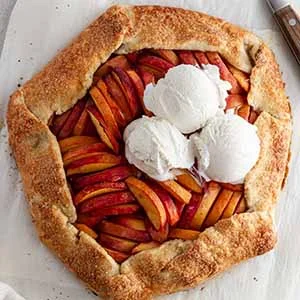
A buttery freeform crust surrounds a juicy fruit filling in this simple and delicious peach galette recipe.
Ingrédients
- 2 1/2 cups all-purpose flour
- 1 teaspoon salt
- 1 teaspoon granulated sugar
- 1 cup unsalted butter (cold, cut into 1/2-inch cubes)
- 1/2 cup ice water
- egg wash (1 egg + 1 tablespoon water, beaten)
- turbinado sugar (for topping)
- 6 fresh peaches (pitted and sliced into 1/2-inch thick slices)
- 1/4 cup brown sugar
- 1 tablespoon cornstarch
- 1 teaspoon cinnamon
- 1 teaspoon ground ginger
- 1/4 teaspoon salt
- 2 teaspoons vanilla
- 1/2 lemon, zest and juice
Préparation
- 1
First, make the pie dough: In the bowl of a food processor, pulse together flour, salt and sugar until combined. Pulse in cold butter until the mixture resembles coarse crumbs, then pulse in ice water just until a dough forms (it will begin to gather in the bowl). Transfer dough to a counter; knead a few times to incorporate dough to a smooth mass, then press into a 1/2-inch-thick disc. Cover tightly with plastic wrap; refrigerate 1 to 2 hours.
- 2
Next, make the filling: Preheat the oven to 400°F. Line a baking sheet with parchment paper. In a large bowl, toss sliced peaches with remaining filling ingredients. Let the mixture sit 20 minutes, stirring occasionally.
- 3
Meanwhile, on a lightly floured surface, roll out chilled dough to a roughly 14-inch circle. Top with peach filling, arranging or spooning filling to within 1 inch of the edges. Fold over edges of the pie dough to encircle filling. Drizzle any remaining juice from filling bowl over peaches. Transfer baking sheet to refrigerator to chill for 10 minutes.
- 4
Brush pie dough edges with egg wash, then sprinkle liberally with turbinado sugar. Bake 45 to 50 minutes, rotating halfway through, until filling is bubbly and pie crust is golden brown and baked through. Serve warm or at room temperature.
- 5
Store leftovers tightly covered in an airtight container in the refrigerator for up to 2 days.
Cuisinez-la avec la recette originale
Cette recette vient de girlversusdough.com. Leur page propose les photos, les notes et les astuces de l’auteur : le meilleur endroit pour la cuisiner.
Voir la recette sur girlversusdough.com