
Costillas con piña y glaseado hawaiano
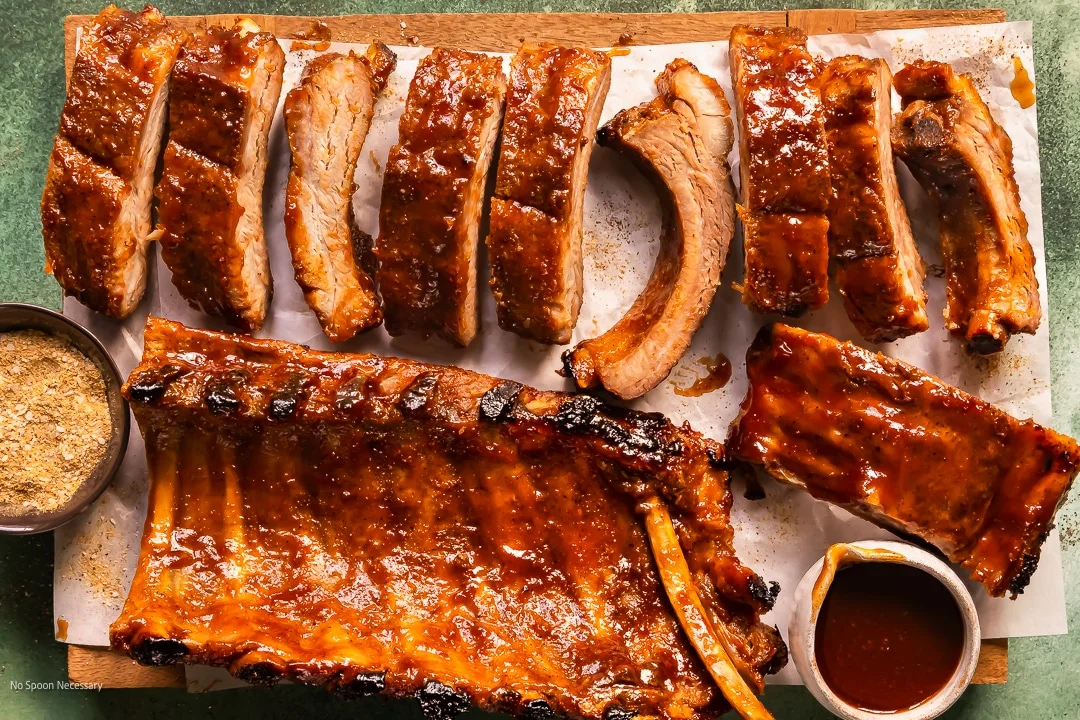
Lleva un poco de sol tropical a la mesa con estas costillas de piña tan tiernas que se desprenden del hueso. Dulces, ahumadas y deliciosas, estas costillas al estilo hawaiano llevan carne de cerdo tierna untada con un glaseado Huli Huli pegajoso, hecho con piña ácida, ajo aromático, jengibre cálido, salsa de soja rica en umami y un toque de picante isleño. Tanto si enciendes la parrilla como el horno, ¡estas costillas irresistibles serán las protagonistas!
Ingredientes
- 2 whole racks Baby Back Pork Ribs (– membrane removed; about 2 pounds each (SEE NOTES))
- 1 TBS Toasted Sesame Oil
- 2 tsp Liquid Smoke (– For Oven Cooking ONLY)
- 3/4 to 1 1/2 cups Pineapple Juice (– For Oven Cooking ONLY (sub: Apple Juice or Beer))
- 1 1/2 TBS Kosher Salt
- 2 1/2 tsp Garlic Powder
- 1 1/4 tsp Freshly Ground Black pepper
- 1 3/4 tsp Ground Ginger
- Scant 1/2 tsp EACH: Ground Coriander and Cayenne Pepper
- 1 Cup Pineapple Juice (– canned; no sugar added)
- 1 Cup Pineapple Chunks
- 3/4 Cup Soy Sauce
- 1/3 Cup Light Brown Sugar (– lightly packed)
- 1/2 Cup Honey
- 1/2 Cup Ketchup
- 1/4 Cup Mirin
- 2-4 cloves Garlic (– peeled and chopped)
- 1 TBS Freshly Grated Ginger
- 1/2 - 1 TBS Sriracha Sauce (– or more to taste)
Preparación
- 1
Make Dry Rub: In a medium bowl, combine the salt, garlic powder, black pepper, ground ginger, ground coriander, and cayenne. Use a fork or small whisk to vigorously stir the ingredients together. Then, set the rub aside.
- 2
Season Rack of Ribs: Place the racks of ribs onto a clean work surface and then season using one of the methods below:Grill and Smoker Cooking: Use a pastry brush to lightly brush both sides of the ribs with the sesame oil. Then, use your fingers to massage the liquid into the meat.Oven Cooking: Add the sesame oil and liquid smoke to a small bowl and stir to combine. Then, use a pastry brush to lightly brush both sides of the ribs with the mixture. Next, use your fingers to massage the liquid into the meat.
- 3
Apply Dry Rub to Ribs: Sprinkle the dry rub evenly over both sides of the ribs, using your fingers to massage the rub into the meat. (Note: about a scant tablespoon of spice rub per side of rack.)
- 4
Refrigerate, Optional, But Recommended: Wrap each rack of rubbed ribs tightly in plastic wrap and then place the ribs onto a large baking sheet. Next, place the ribs in the fridge and let them marinate in the spice rub overnight. (Note: I recommend 8-12 hours, no more than 24 hours.)
- 5
Let Ribs Come to Room Temperature: When Ready to Cook, Let Ribs Come to Room Temp: Remove the sheet pan of ribs from the refrigerator and place it onto the kitchen counter. Let the ribs sit for at least 30 minutes to 1 ½ hours to come to room temperature before selecting one of the cooking methods below.
- 6
Meanwhile, Make the Huli Huli Pineapple Glaze: To a heavy nonreactive saucepan, add the pineapple juice, pineapple chunks, soy sauce, sugar, honey, ketchup, mirin, garlic, ginger, and sriracha. Season with ¼ teaspoon kosher salt and 1/8 teaspoon black pepper. Place the pan over medium-high heat and bring the sauce to a simmer, stirring occasionally. Once simmering, reduce to maintain a rapid simmer, and cook until the sauce is thickened and slightly syrupy, about 15 minutes. Turn off the heat under the pan and use an immersion blender to blend the ingredients until smooth. Alternatively, transfer the sauce to a stand blender and blend until smooth. Set the sauce aside or cover and store in the refrigerator.
- 7
--- Oven Baking Instructions ---
- 8
Preheat Oven and Prep Ribs for Baking: Adjust the oven rack to the middle position and then preheat the oven to 250-degrees Fahrenheit. Set a wire rack inside roasting pan or a large, rimmed baking sheet and then grease the rack to prevent sticking. Next, unwrap the ribs, discard the plastic wrap, and place the rack of ribs onto the wire rack, arranging them so they are meat-side-up. Pour the pineapple juice around the ribs and into the pan, adding just enough to lightly cover the bottom of the pan. Then, cover the pan tightly with two layers of aluminum foil.
- 9
Bake Pork Ribs: Transfer the wrapped pork ribs to the preheated oven and bake for 2 to 3 hours, or until you can push a toothpick into the meat with little resistance. Then, remove the ribs from oven. (Note: Check on the ribs at the 2-hour mark. If they’re not tender, return them to the oven for 20 to 30 minutes and check again.) Line a large baking sheet with aluminum foil and spray with non-stick grease to prevent sticking. Then, transfer the ribs to the foil, laying the rack down so the meaty side is facing down with the bone side facing you.
- 10
Brush with Hawaiian Sauce and Bake Again: Brush with Pineapple Sauce and Bake Again: Increase the oven temperature to 375-degrees Fahrenheit. Slather the boney side of each rib rack liberally with the huli huli sauce. Return the ribs to the oven (bone side still facing up) and bake for 5 minutes. Remove the ribs from the oven and carefully flip the rack over so the meaty side is now facing up. Slather the racks liberally again with the huli huli glaze. Then return to the oven and back for 5 minutes. Remove the baby back ribs from the oven and brush the meaty side with Hawaiian huli sauce again. EITHER: Return to the oven and bake for 5 minutes, or until ribs are very tender and coated with a thick BBQ glaze. OR: Switch oven to broil and broil the ribs for 2-3 minutes, or until the glaze is caramelized and ribs and very tender. (Note 1: You can repeat brushing the ribs with sauce and baking if you prefer a super thick barbecue sauce glaze.) (Note 2: When broiling, keep a careful eye on the ribs and don’t walk away from the oven.) (Note 3: The ribs are done grilling when the meat has shrunk back from the ends of the bones, the meat is tender enough to pull apart with your fingers, and you reach an internal temperature of 195-degrees Fahrenheit.)
- 11
Rest Ribs: Transfer the ribs to a clean work surface and tent them lightly with aluminum foil. Let the oven pork ribs rest for at least 15 minutes.
- 12
Slice Ribs: Use a sharp knife and slice between the ribs to cut into individual or multiple rib portions.
- 13
Serve Pineapple Ribs and Enjoy! Serve oven baked pork ribs with extra barbecue sauce and plenty of napkins on the side. Enjoy!
- 14
--- Grilling Instructions ---
- 15
Heat Grill: Preheat a charcoal or gas grill to between 225 and 250-degrees Fahrenheit and set up using indirect heat. Then, oil the grates. (Note: Charcoal grill, push the coals to onside of the grill. Gas grill, turn off all the burners except one or two on one side.)
- 16
Grill Ribs: Unwrap the ribs, discarding the plastic wrap, and place the ribs onto the grates, arranging them so they’re meat-side-up (bone-side-down). Cover the grill and cook the ribs for 2 to 3 hours, or until the meat is just starting to shrink back from the ends of the bones. (Note: Check on the ribs for doneness at the 1 1/2 hour mark.)
- 17
Baste with Huli Huli Sauce and Continue to Grill: During the last hour or so of grilling, start flipping and basting each rack with the pineapple sauce every 15 minutes, remembering to close the lid on the grill when you aren’t basting the ribs. The ribs are done grilling when the meat has shrunk back from the ends of the bones, the meat is tender enough to pull apart with your fingers, and you reach an internal temperature of 195-degrees Fahrenheit.
- 18
Rest Ribs: Transfer the ribs to a clean work surface and tent them lightly with aluminum foil. Let the oven pork ribs rest for at least 15 minutes.
- 19
Slice Ribs: Use a sharp knife and slice between the ribs to cut into individual or multiple rib portions.
- 20
Serve Pineapple Ribs and Enjoy! Serve oven baked pork ribs with extra barbecue sauce and plenty of napkins on the side. Enjoy!
Cocínala con la receta original
Esta receta es de nospoonnecessary.com. En su web tienes las fotos, las notas y los consejos del autor: es el mejor sitio para cocinarla.
Ver la receta en nospoonnecessary.com