
Bulgogi de cerdo picante coreano
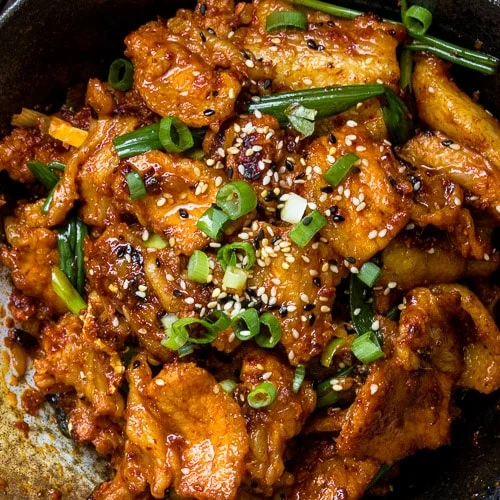
Una receta fácil de bulgogi de cerdo picante coreano hecha con finas rodajas de panceta de cerdo y una salsa de gochujang dulce que se puede servir con una guarnición de arroz, envuelta en lechuga o utilizada en tacos.
Ingredientes
- 1 1/2 lb 650g pork belly ((or pork shoulder/pork butt))
- 3 stalks green onions ((cut into 1 1/2 inch chunks, including the whites))
- 2 tablespoons garlic ((grated, approximately 5-6 cloves))
- 1 1/2 tablespoon ginger ((grated, approximately 1 inch of ginger))
- 1 medium onion
- 3 1/2 tablespoons gochujang (Korean hot pepper paste)
- 1 tablespoons soy sauce ((or 1/2 tablespoons fish sauce))
- 2 tablespoons honey ((or sugar))
- 1 tablespoon sesame oil
- 2 tablespoons mirin cooking wine
- 3 tablespoons water
- 1 tablespoon gochugaru (Korean red chili pepper flakes) ((Optional, if you like it spicy))
Preparación
- 1
--- Preparation ---
- 2
Remove the root end of the green onion and cut them into 1 ½ inch long chunks (including the whites of the green onions). Slice the thicker, white ends lengthwise again so that it is the same thickness as the greens.
- 3
If your pork belly comes with skin, remove the skin and discard it.
- 4
Freeze the pork belly for 1 hour. This will make it easier to slice thinly. If you are using a larger cut of meat like a pork shoulder, you may need to freeze it for a longer period of time.
- 5
--- Marinate the Pork Belly ---
- 6
Peel the garlic, slice the ginger, and dice the onion into 1-inch cubes.
- 7
In a food processor, blend the garlic, ginger, and onion together into a paste. (You can also grate it by hand if you don't have a food processor.) Place the blended garlic, ginger, and onion in a large bowl.
- 8
Add 3 ½ tablespoons gochujang (Korean hot pepper paste), 1 tablespoons soy sauce (or fish sauce), 2 tablespoons honey, 1 tablespoon sesame oil, 2 tablespoons mirin cooking wine, 3 tablespoons water, and 1 tablespoon gochugaru (Korean red chili pepper flakes) into the bowl with the blended garlic, ginger, and onion and mix everything together.
- 9
Remove the pork belly from the freezer and thinly slice it. I like to slice it approximately 1/8 inch or thinner.
- 10
Add the pork belly into the marinade and mix everything well. Marinade it in the fridge for a minimum of 1 hour (the longer you marinade it, the more flavorful it will be).
- 11
--- Cooking the Spicy Korean Pork Bulgogi ---
- 12
Set the stove on high heat and set a non-stick frying pan or a high walled pot (to prevent splatter) on the stove and add a bit of oil into it.
- 13
Once the oil is hot, add the pork belly in the pan (including any extra marinade, this will be the sauce)
- 14
Pan fry on high heat for 8-11 minutes. Pork belly splatters quite a bit, so be careful or wear an apron to prevent staining on your clothes.
- 15
Once the pork belly is cooked, turn off heat, add green onions and mix the onions around to let the heat wilt it.
- 16
--- 3 Different Ways to Serve This ---
- 17
The quickest way to enjoy this is to serve it with white rice.
- 18
You can also share this and have it as lettuce wraps! Set out a pile of green leaf lettuce (or perilla leaves), with steamed white rice. To eat it, you can add a bit of rice, green onions, and a piece of Spicy Korean Pork Bulgogi to the lettuce, wrap it, and eat it!
- 19
This spicy Korean pork also goes well in tacos! If you're having a taco night, use this as the protein instead and top it with your usual taco toppings! (I like to add lime juice-pickled red onions, sour cream, and a bit of cheese)
Cocínala con la receta original
Esta receta es de pupswithchopsticks.com. En su web tienes las fotos, las notas y los consejos del autor: es el mejor sitio para cocinarla.
Ver la receta en pupswithchopsticks.com