
Masa tradicional para pierogi (apta para veganos, sin huevo)
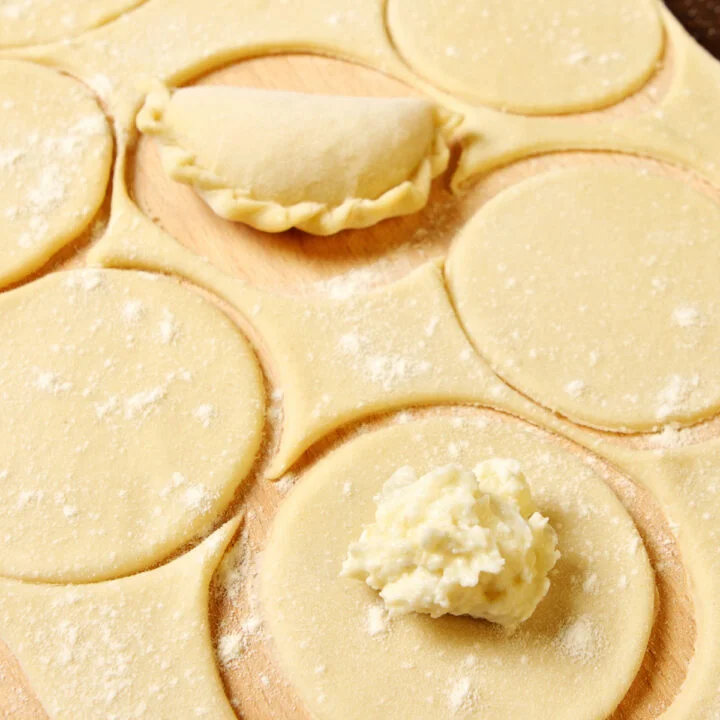
Esta masa tradicional para pierogi es la más sencilla, hecha de harina y agua. Es elástica, flexible, blanda y fácil de trabajar. Puedes estirar esta masa muy fina y no se romperá al doblarla. La receta no lleva huevos, por lo que es apta para veganos.
Ingredientes
- 4 cups (500 g) all purpose flour
- 1 cup (8.45 fl oz, 250 ml) hot water
- 1 tsp salt
Preparación
- 1
Sift four cups of flour onto your work...: Sift four cups of flour onto your work surface. Make a well and pour in a little bit of hot water. Mix everything together using your hands, aiming to evenly moisten the flour as you go.
- 2
Gradually add more water and continue blending it...: Gradually add more water and continue blending it with the flour.
- 3
Observe the forming dough and allow it to...: Observe the forming dough and allow it to “drink” as much water as it requires. You’ll know it has enough liquid, once the dough doesn’t stick to your hands anymore.
- 4
Continue kneading until the dough is soft, elastic...: Continue kneading until the dough is soft, elastic and there aren’t any lumps. It can take a while, so don’t get discouraged.
- 5
Attach a dough hook. Place four cups of...: Attach a dough hook. Place four cups of flour in the work bowl.
- 6
With the machine running, gradually add hot water,...: With the machine running, gradually add hot water, up to half a cup.
- 7
Once you’re done, stop the mixer. Poke the...: Once you’re done, stop the mixer. Poke the dough a bit with your fingers. Ideally, the dough should be soft, but still hold its shape when pinched. If it feels too loose - add a tablespoon of flour. If it feels too tough, add some water (a teaspoon at the time).
- 8
Run the mixer for 5 minutes. After that...: Run the mixer for 5 minutes. After that time the dough should be soft, elastic and it shouldn’t stick to your hands.
- 9
To let the gluten develop, cover the dough...: To let the gluten develop, cover the dough ball for 15-30 minutes and keep at room temperature. You can use a cloth or a warmed bowl placed upside-down.
- 10
Once rested, divide the dough into workable chunks...: Once rested, divide the dough into workable chunks (I quartered it, but that’s up to you).
- 11
Dust your working surface with flour. Roll out...: Dust your working surface with flour. Roll out a chunk of dough, as thinly as you can.
- 12
Cut out circles, roughly 3 inches (7.5-8 cm)...: Cut out circles, roughly 3 inches (7.5-8 cm) in diameter. You can use a round cookie cutter, or a glass rim.
- 13
Place a tablespoon of your chosen filling in...: Place a tablespoon of your chosen filling in the middle of each pastry round. Fold the edges together, creating a semi-circular dumpling. Press the edges firmly. Continue, until you’re out of dough and the filling.
- 14
Once all pierogi are assembled, boil a large...: Once all pierogi are assembled, boil a large pot of water. Drop in a few pierogi at the time, waiting for them to float. Once they do, cook for another minute. Then remove them with a slotted spoon.
- 15
Serve immediately with melted butter or another topping...: Serve immediately with melted butter or another topping of your choice. Alternatively, melt a tablespoon of butter on a frying pan and fry pierogi on both sides until golden. If you would like to learn more, have a look at this post on how to cook pierogi.
Cocínala con la receta original
Esta receta es de polonist.com. En su web tienes las fotos, las notas y los consejos del autor: es el mejor sitio para cocinarla.
Ver la receta en polonist.com