
Risotto de vieiras al champán
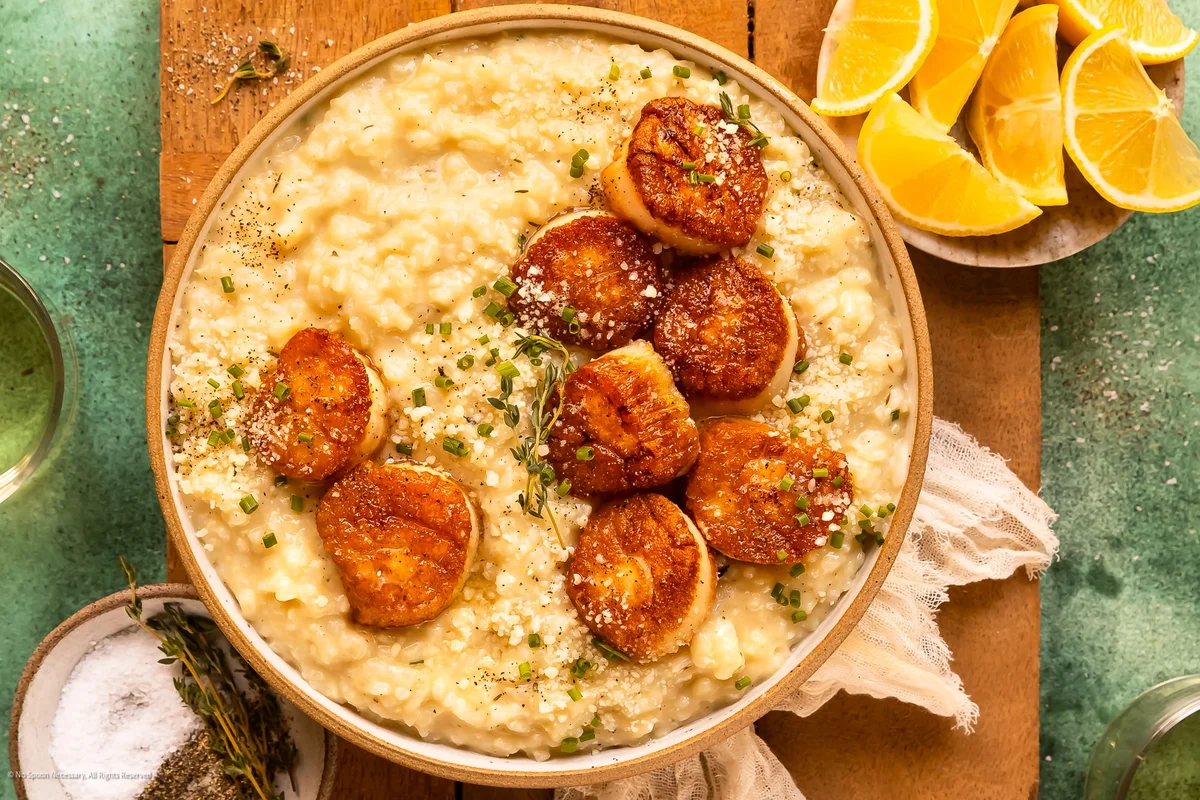
Si buscas un plato delicioso y lujoso para ocasiones especiales y cenas románticas en casa, ¡esta receta de risotto con vieiras es perfecta! Con unas vieiras doradas, mantecosas y jugosas sobre una cama de risotto al champán horneado en el horno, este plato es cremoso, elegante y muy fácil de preparar.
Ingredientes
- 6 TBS Unsalted Butter ( - DIVIDED)
- 2 large Shallots ( – peeled and finely chopped (about 3/4 cup))
- 2-3 large cloves Garlic ( – peeled and minced)
- 1 tsp Fresh Thyme Leaves
- 1 1/2 Cups Arborio Rice ((282 grams))
- 1 Cup + 6 TBS Dry Champagne ( – DIVIDED; at room temperature, or more to taste (sub: sparkling wine or white wine))
- 4 1/2 Chicken Bouillon Cubes
- 1/2 to 3/4 Cup Freshly Grated Parmesan Cheese ((sub: pecorino Romano))
- Kosher Salt and Ground Black Pepper
- Optional for Garnish: Snipped Chives or Microgreens (Lemon Wedges, Heavy Cream)
- 1 1/4 pound Fresh Dry Sea Scallops ( – foot removed and discarded; about 12 large scallops (SEE NOTES))
- 2-3 TBS Vegetable or Canola Oil (- enough to coat the bottom of your pan)
- 2 sprigs Fresh Thyme
Preparación
- 1
Preheat Oven: Arrange oven rack to the lower third position and then preheat the oven to 400-degrees Fahrenheit.
- 2
Start Risotto – Sweat Aromatics: Heat 3 tablespoons of the butter in a large saucepan or Dutch oven over medium to medium-low heat. Once the butter is melted, add the shallots and season with ¾ teaspoon of salt and heaping ¼ teaspoon pepper. Cook, stirring occasionally, until the shallots are softened, about 2 minutes. Add the garlic and thyme leaves and cook, stirring, until fragrant, 30 seconds to 1 minute.
- 3
Add Arborio Rice: Add Arborio: Add the rice to the pot and increase the heat to medium. Cook the rice, stirring frequently, until the rice is lightly toasted, fragrant, and every grain is coated in the butter/oil, about 3-4 minutes.
- 4
Add Champagne Wine: Add Champagne: Pour one cup of champagne into the pot and cook, stirring occasionally, for about 2 minutes, or until the rice just starts to look creamy in texture.
- 5
Add Warm Broth: Add 4 ¼ cups of warm broth to the pot. Then, increase the heat to medium-high and bring the contents to a rapid simmer, stirring occasionally.
- 6
Cover and Bake Risotto: Cover, Bake, Stir: Cover the Dutch oven or saucepan and transfer it to the preheated oven. Bake for 10 minutes. Remove the pot from the oven, uncover, and give the risotto a good stir.
- 7
Stir Risotto, Continue Baking: Return to Oven, Bake Again: Recover and return to the oven. Continue to bake the champagne risotto for 10-15 minutes, or until the rice is tender, and the liquid is almost all absorbed.
- 8
Meanwhile, Prepare Scallops: While Risotto is in Oven, Prepare the Scallops: Cover a clean work surface with paper towels. Next, place all the scallops on top of the paper towels and pat dry. Next, season the scallops generously with salt on all sides. Cover the scallops with more paper towels and thoroughly pat dry. Transfer the dry scallops to the refrigerator and let chill for at least 20 minutes. Remove the scallops from the fridge and pat them dry again using more paper towels.
- 9
Heat Pan, Sear Scallops: Heat Pan, Then Sear Scallops in 2 Batches: Heat 2-3 tablespoons of oil (enough to just coat the bottom of your pan) in a large cast iron skillet or stainless-steel pan over high heat until very hot and lightly smoking. Working in two batches to prevent over-crowding the pan, add half the scallops to the pan, arranging them so that there is a space in between each one to prevent steaming. Cook the scallops, without moving or touching them, for 1 ½ - 2 minutes, or until the underside is well browned and the scallop releases easily from the pan. Then, carefully flip the scallops over and continue to cook for 1 – 1 ½ minutes longer, or until the other side of the scallops are well browned and the mollusks are just opaque throughout. Use tong or a fish spatula to transfer the seared scallops to a paper towel-lined plate to drain or excess grease. Season with a pinch of salt. Repeat the cooking process, adding the remaining oil and scallops to the pan; remove scallops to plate and season with a pinch of salt. (Note: I typically cook my sea scallop for 2 minutes on the first side and one minute on the second side.)
- 10
Make Butter Sauce: Return the pan to medium heat. Add 4 tablespoons (1/4 cup) of champagne to the pan and use the back of a wooden spoon to scrape up any brown bits (fond) from the bottom of the pan. Add 2 tablespoons of butter, thyme sprigs, a generous pinch of salt, and a pinch of pepper. Then, use your spoon or whisk to stir and melt the butter. Set the pan of butter aside.
- 11
Adjust Risotto For Taste: Once Risotto is Done Baking, Add Remaining Broth, Butter, Champagne, and Cheese: Transfer the pot of risotto from the oven to the stovetop and turn the burner to low heat. Give the risotto a good stir. Next, add the remaining ¼ cup of warm broth, tablespoon of butter, 2 tablespoons of champagne, and ½ cup of the parmesan cheese to the pot. Gently stir to combine and then take a bite of the risotto and adjust for taste, adding champagne or lemon juice for acidity, butter or heavy cream for richness, salt and pepper for overall flavor, and warm broth to thin the risotto. (Note: I typically add 2 more tablespoons of champagne, ¼ cup more broth, and 2 tablespoons of heavy cream.)
- 12
Serve Scallop Risotto: Top Risotto with Scallops: Using a large kitchen spoon, transfer the risotto to a large serving bowl or platter. Top with the seared scallop and drizzle the butter in the pan all over the scallops. Next, squeeze fresh lemon juice all over the scallops and sprinkle the remaining grated parmesan, and chives or microgreens all over the scallop risotto, if using. Enjoy immediately.
Cocínala con la receta original
Esta receta es de nospoonnecessary.com. En su web tienes las fotos, las notas y los consejos del autor: es el mejor sitio para cocinarla.
Ver la receta en nospoonnecessary.com