
Samosas de tres quesos
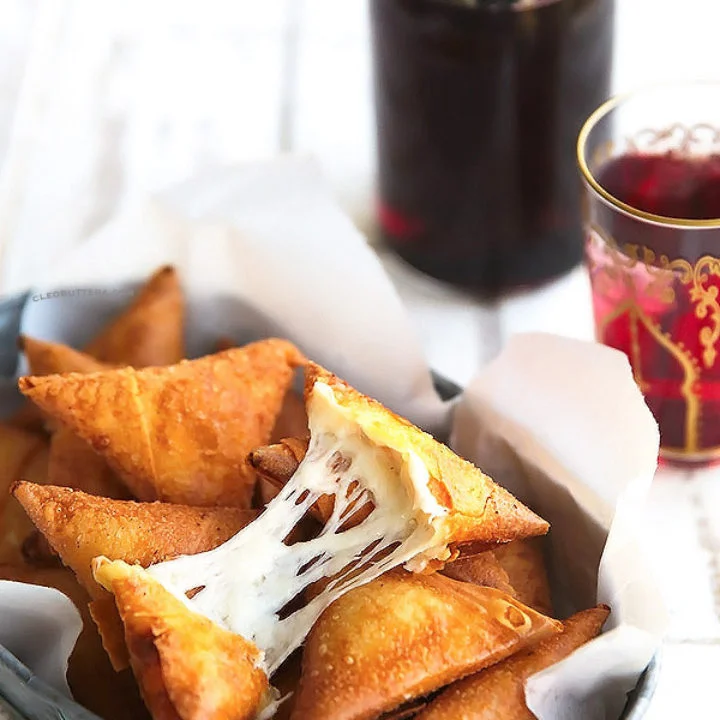
Una mezcla fundente y elástica de queso mozzarella, feta y crema de queso envuelta en una crujiente masa de samosa. Estos divertidos triángulos son el aperitivo perfecto para los amantes del queso. ¡Se pueden hacer con masa filo! Considera doblar la receta y guardarla en el congelador para cuando lo necesites.
Ingredientes
- 350g/ 12.4oz (3 cups) mozzarella cheese (similar melty cheese may be substituted), shredded
- 8 squares Kiri or 113g/ 4oz cream cheese, softened
- 1 1/2 tablespoons (21g/ 3/4oz) creamy, salty white cheese, like creamy feta, barameely or istanboli
- 2 1/2 tablespoons (19g) all-purpose flour
- 2 tablespoons water
- Neutral tasting oil like vegetable, sunflower, corn or canola oill
- 22 samosa sheets, about half of a 500g package (could be substituted with phyllo dough or spring roll wrappers. *See note), thawed
Preparación
- 1
In a medium bowl, mash together with a...: In a medium bowl, mash together with a fork the cream cheese and salty white cheese until smooth. Add the mozzarella cheese and stir together until well combined. Set aside.
- 2
In a small bowl, stir together the flour...: In a small bowl, stir together the flour and water until smooth and form a paste similar in consistency to white glue.
- 3
Working with one samosa sheet at a time,...: Working with one samosa sheet at a time, keep the rest covered under a tea towel, to prevent from drying out. (*If using phyllo or spring roll wrapper, please see note below)
- 4
To fold and fill the sheet, follow the...: To fold and fill the sheet, follow the instructions on the back of package or please refer to the pictured instructions in the post above or watch this tutorial. Start by bringing the top right corner of the sheet, halfway down to the left side. From the top, you should be able to see a triangle forming underneath. Add some of the flour paste to adhere the fold that has formed to the long sheet. Add a little more paste to the right hand side of the sheet.
- 5
Now bring the triangle that has formed on...: Now bring the triangle that has formed on the left side, down to the right side, landing on the paste you just added. A cone shape should now be formed. Make sure that the corner of the cone is tight and doesn't have a big hole, so the filling doesn't escape during frying.
- 6
Lift the samosa sheet from the working surface...: Lift the samosa sheet from the working surface and let it rest on the palm of your left hand. With your right hand, using a spoon (I prefer to using a small ice cream scoop for easy release), stuff the cone with about 1 1/2 tablespoons of the cheese mixture.
- 7
Place the filled cone/sheet back onto the working...: Place the filled cone/sheet back onto the working surface, and lightly flatten the filling with your hand. Dab some of the flour paste on all the remaining sides.
- 8
Fold down the filled cone to the left...: Fold down the filled cone to the left side, then fold down once again to the right side. You should now have a perfect triangle with a little tail sticking out. Bring the tail up and adhere it to the triangle. Now you have a perfectly shaped samosa triangle. Repeat with the remaining sheets.
- 9
Keep the wrapped samosas cold in the freezer...: Keep the wrapped samosas cold in the freezer until you're ready to fry (at least until you heat the oil) or fully freeze and store in zipper lock bags for up to 1 month. Just let them thaw slightly, for 10 to 15 minutes before frying.
- 10
To fry the samosas, fill a skillet with...: To fry the samosas, fill a skillet with enough oil just to cover the bottom of the skillet. DO NOT deep fry the samosas in lots of oil or the cheese will ooze out. Heat over medium heat until shimmering.
- 11
Place enough samosas to fill the skillet without...: Place enough samosas to fill the skillet without overcrowding it. Fry for about 2 to 3 minutes on the first side until golden brown in color, then turn them to the other side and cook for another minute or two until nicely browned as well.
- 12
Transfer to paper towels to drain then arrange...: Transfer to paper towels to drain then arrange on to a serving platter to serve. Best enjoyed while still warm, so the cheese is still ooey and gooey. When cooled, the cheese filling will remain nice and soft but not melty and oozy.
Cocínala con la receta original
Esta receta es de cleobuttera.com. En su web tienes las fotos, las notas y los consejos del autor: es el mejor sitio para cocinarla.
Ver la receta en cleobuttera.com