
Tarta angel food de capas
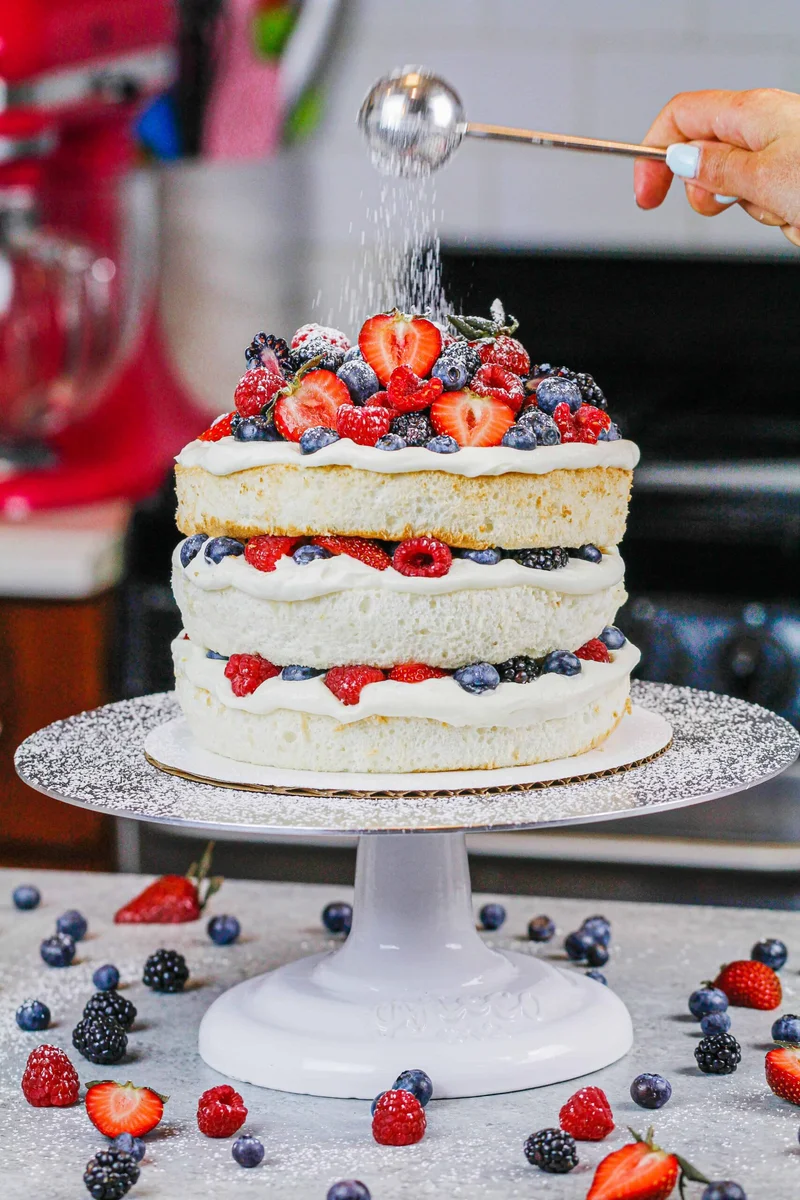
Esta tarta angel food de capas está cubierta con una crema batida esponjosa y repleta de frutos rojos jugosos. Es el postre de verano perfecto y ligero.
Ingredientes
- 10 large egg whites, freshly separated and at room temp (300g)
- 2 Tbsp fresh lemon juice (20g)
- 1 Tbsp warm water (12g)
- 1 1/2 tsp cream of tartar (5g)
- 1 tsp lemon zest (2g)
- 1/2 cup granulated sugar (100g)
- 1 cup cake flour (120g)
- 1 1/4 cup powdered sugar (150g)
- 1 tsp fine salt (6g)
- 1 cup (8 oz) block full-fat cream cheese, cold (226g)
- 1 cup powdered sugar (125g)
- 1 tsp vanilla extract or vanilla bean paste (4g)
- 2 1/2 cups heavy whipping cream, cold (600g)
- 1 pint fresh blueberries
- 1 pint fresh raspberries
- 1 pint fresh blackberries
- 1 lb. fresh strawberries, sliced in half
Preparación
- 1
--- Angel Food Cake Layers ---
- 2
Preheat oven to 325°F/162°C and line three 7-inch or 8-inch cake pans with parchment paper. DO NOT GREASE THE PANS!! If you accidentally did, wash out the grease and dry them before adding in the parchment paper.
- 3
Add 10 egg whites, 2 Tbsp of fresh lemon juice, 1 Tbsp of warm water, 1 1/2 tsp of cream of tartar, and 1 tsp of lemon zest into the bowl of a stand mixer fitted with the whisk attachment. Mix on a low speed for 1 minute to combine the ingredients.
- 4
Gradually add in 1/2 cup of granulated sugar. Increase the speed to medium-high and mix until soft peaks have formed and the mixture has quadrupled in volume.
- 5
Sift 1 cup cake flour, 1 1/4 cups powdered sugar, and 1 tsp salt into the egg mixture. Use a rubber spatula to gently fold the dry ingredients into the whipped egg whites in 2 additions. Mix just until you can't see any streaks of flour (it's ok if there are some small lumps).
- 6
Divide the batter evenly between the prepared pans and smooth out the batter with the back of your rubber spatula. Bake for 22-25 minutes or until a toothpick comes out clean and the tops are lightly browned. Do NOT open the oven door while the layers bake, or they can deflate!
- 7
Place the cake layers upside down on a metal cooling rack and let the cake layers cool fully in the pan. Don't worry, the layers won't fall out of the pan! Once they're fully cooled, run an offset spatula around the edge of the pan to carefully loosen the layers.
- 8
Remove the cake layers from the pans, then set them aside while you make the whipped cream frosting.
- 9
--- Whipped Cream Frosting with Cream Cheese ---
- 10
Chill your mixing bowl and whisk attachment in the freezer for 30 minutes to help this whipped cream frosting whip up better.
- 11
Place 1 cup (8 oz. block) of cold cream cheese into the chilled mixing bowl and mix on a medium speed until smooth.
- 12
Add in 1 cup of powdered sugar and mix on low at first to avoid powdered sugar clouds/explosions. Increase the speed to medium-high once the powdered sugar is incorporated and mix for about 1 minute. Scrape the bowl with a rubber spatula as needed throughout this process.
- 13
Add in 1 tsp of vanilla extract, then turn the mixer to a medium-high speed and gradually pour in 2 1/2 cups of cold heavy cream. I like to do this in about 4 additions and focus on pouring the heavy cream down the side of the bowl to prevent it from splattering.
- 14
Watch the mixture closely once the heavy cream is fully mixed in. It should thicken and take shape shortly after this (mine usually does within about 30 seconds of mixing after I've added in all the heavy cream). Take care not to over-mix this whipped cream frosting!! It will become soupy, and sadly, you won't be able to fix it.
- 15
As soon as you see the frosting start to take shape, turn off your mixer and do a quick whisk test. Dunk your whisk attachment into the frosting, then take it out and flip it upside down. The frosting should keep its shape and form a nice peak. If it doesn't, continue to mix the frosting on a medium-high speed for 30-second intervals until it does.
- 16
Once it passes the whisk test, cover it with plastic wrap and place it in the fridge until you're ready to use it.
- 17
--- Assembling this Layered Angel Food Cake ---
- 18
Build this layered angel food cake on a greaseproof cake board using a dab of whipped cream frosting to help stick the first cake layer to the board. Place the cake layer upside down to make it easier to frost.
- 19
Spread a thick layer of the whipped cream frosting on the cake layer and top with about 1/3 of the fresh berries. Repeat with the remaining cake layers.
- 20
Decorate the top of the cake with the remaining berries and a dusting of powdered sugar, then enjoy!
Cocínala con la receta original
Esta receta es de chelsweets.com. En su web tienes las fotos, las notas y los consejos del autor: es el mejor sitio para cocinarla.
Ver la receta en chelsweets.com